Lutron Homeworks Tutorial

"Area Scenes" Set Up & Overview

Welcome to this Lutron Homeworks QS Tutorial,
This is addressed to New Lutron Programmers. Let’s review how to set up Area Scenes as well as where they can be used within the Lutron Homeworks QS Software.

Area Scenes” are lighting scenes that are set up from one single place.

Once set up, we can access and use those scenes at various places in our Lutron Homeworks QS database.

The main advantage being that, when you make a change in one of those scenes,  it gets automatically updated in the entire database. In every places where that scene is being used –  all in one single operation!

This really helps optimising time when programming and maintaining a Lutron Homeworks QS system.

Setting Up "Area Scenes" in Lutron HomeWorks QS

“Area scenes” are automatically created every time we create a room, and they are only for lighting circuits.   

Let me select the “Master Bedroom” here for example. 

As we can see, we have 4 scenes and an “Off” that are already pre-programmed by the Homeworks QS system.  

By default:  

  • “Scene 1” has all the lighting circuits in the “Master Bedroom” already set to 100% .  
  • Same thing for “Scene 2” but with the circuits set to 75%  
  • “Scene 3” is set to 50%  
  • and “Scene 4” is set to 25%  
  • We also have an “off scene” with all circuits set to “Off” or 0%
Area Scenes are automatically created in Lutron HomeWorks QS
Click to enlarge
Area Scenes and off by default in Lutron HomeWorks QS
Click to enlarge
Add more area scenes in Lutron HomeWorks QS
Click to enlarge
Rename area scene in Lutron HomeWorks QS
Click to enlarge
Select Area Scene in Lutron HomeWorks QS
Click to enlarge

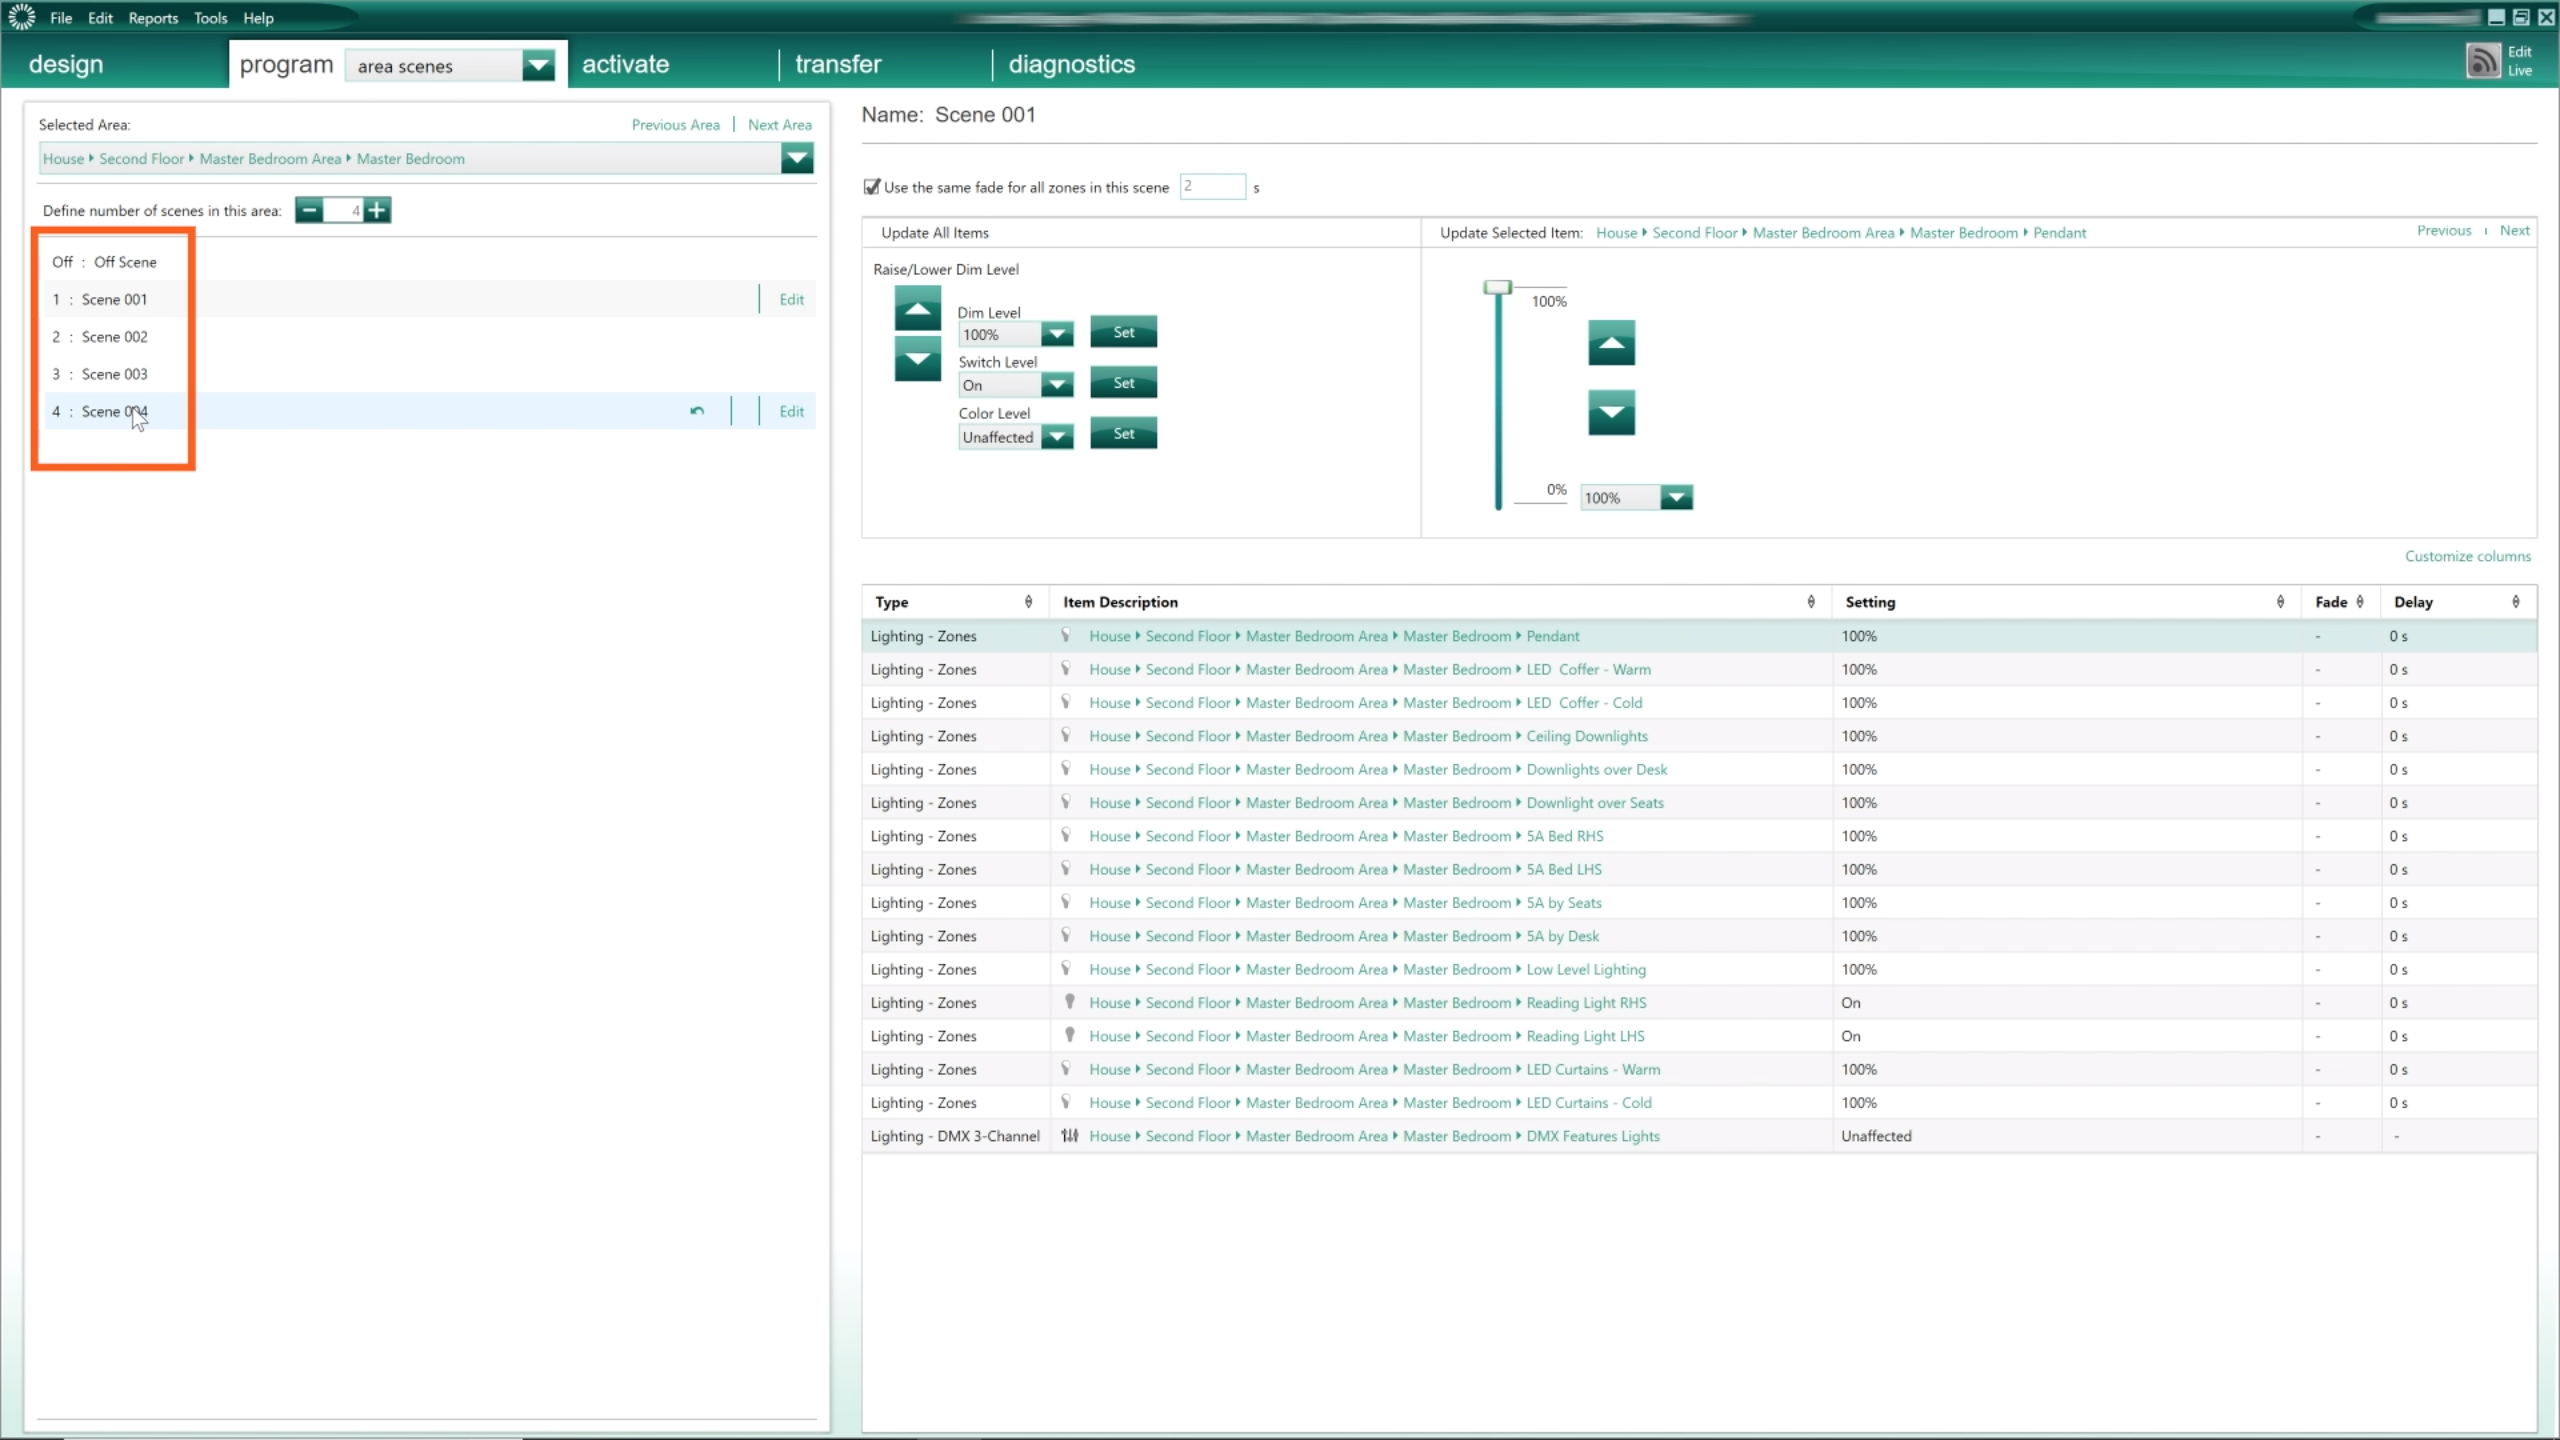
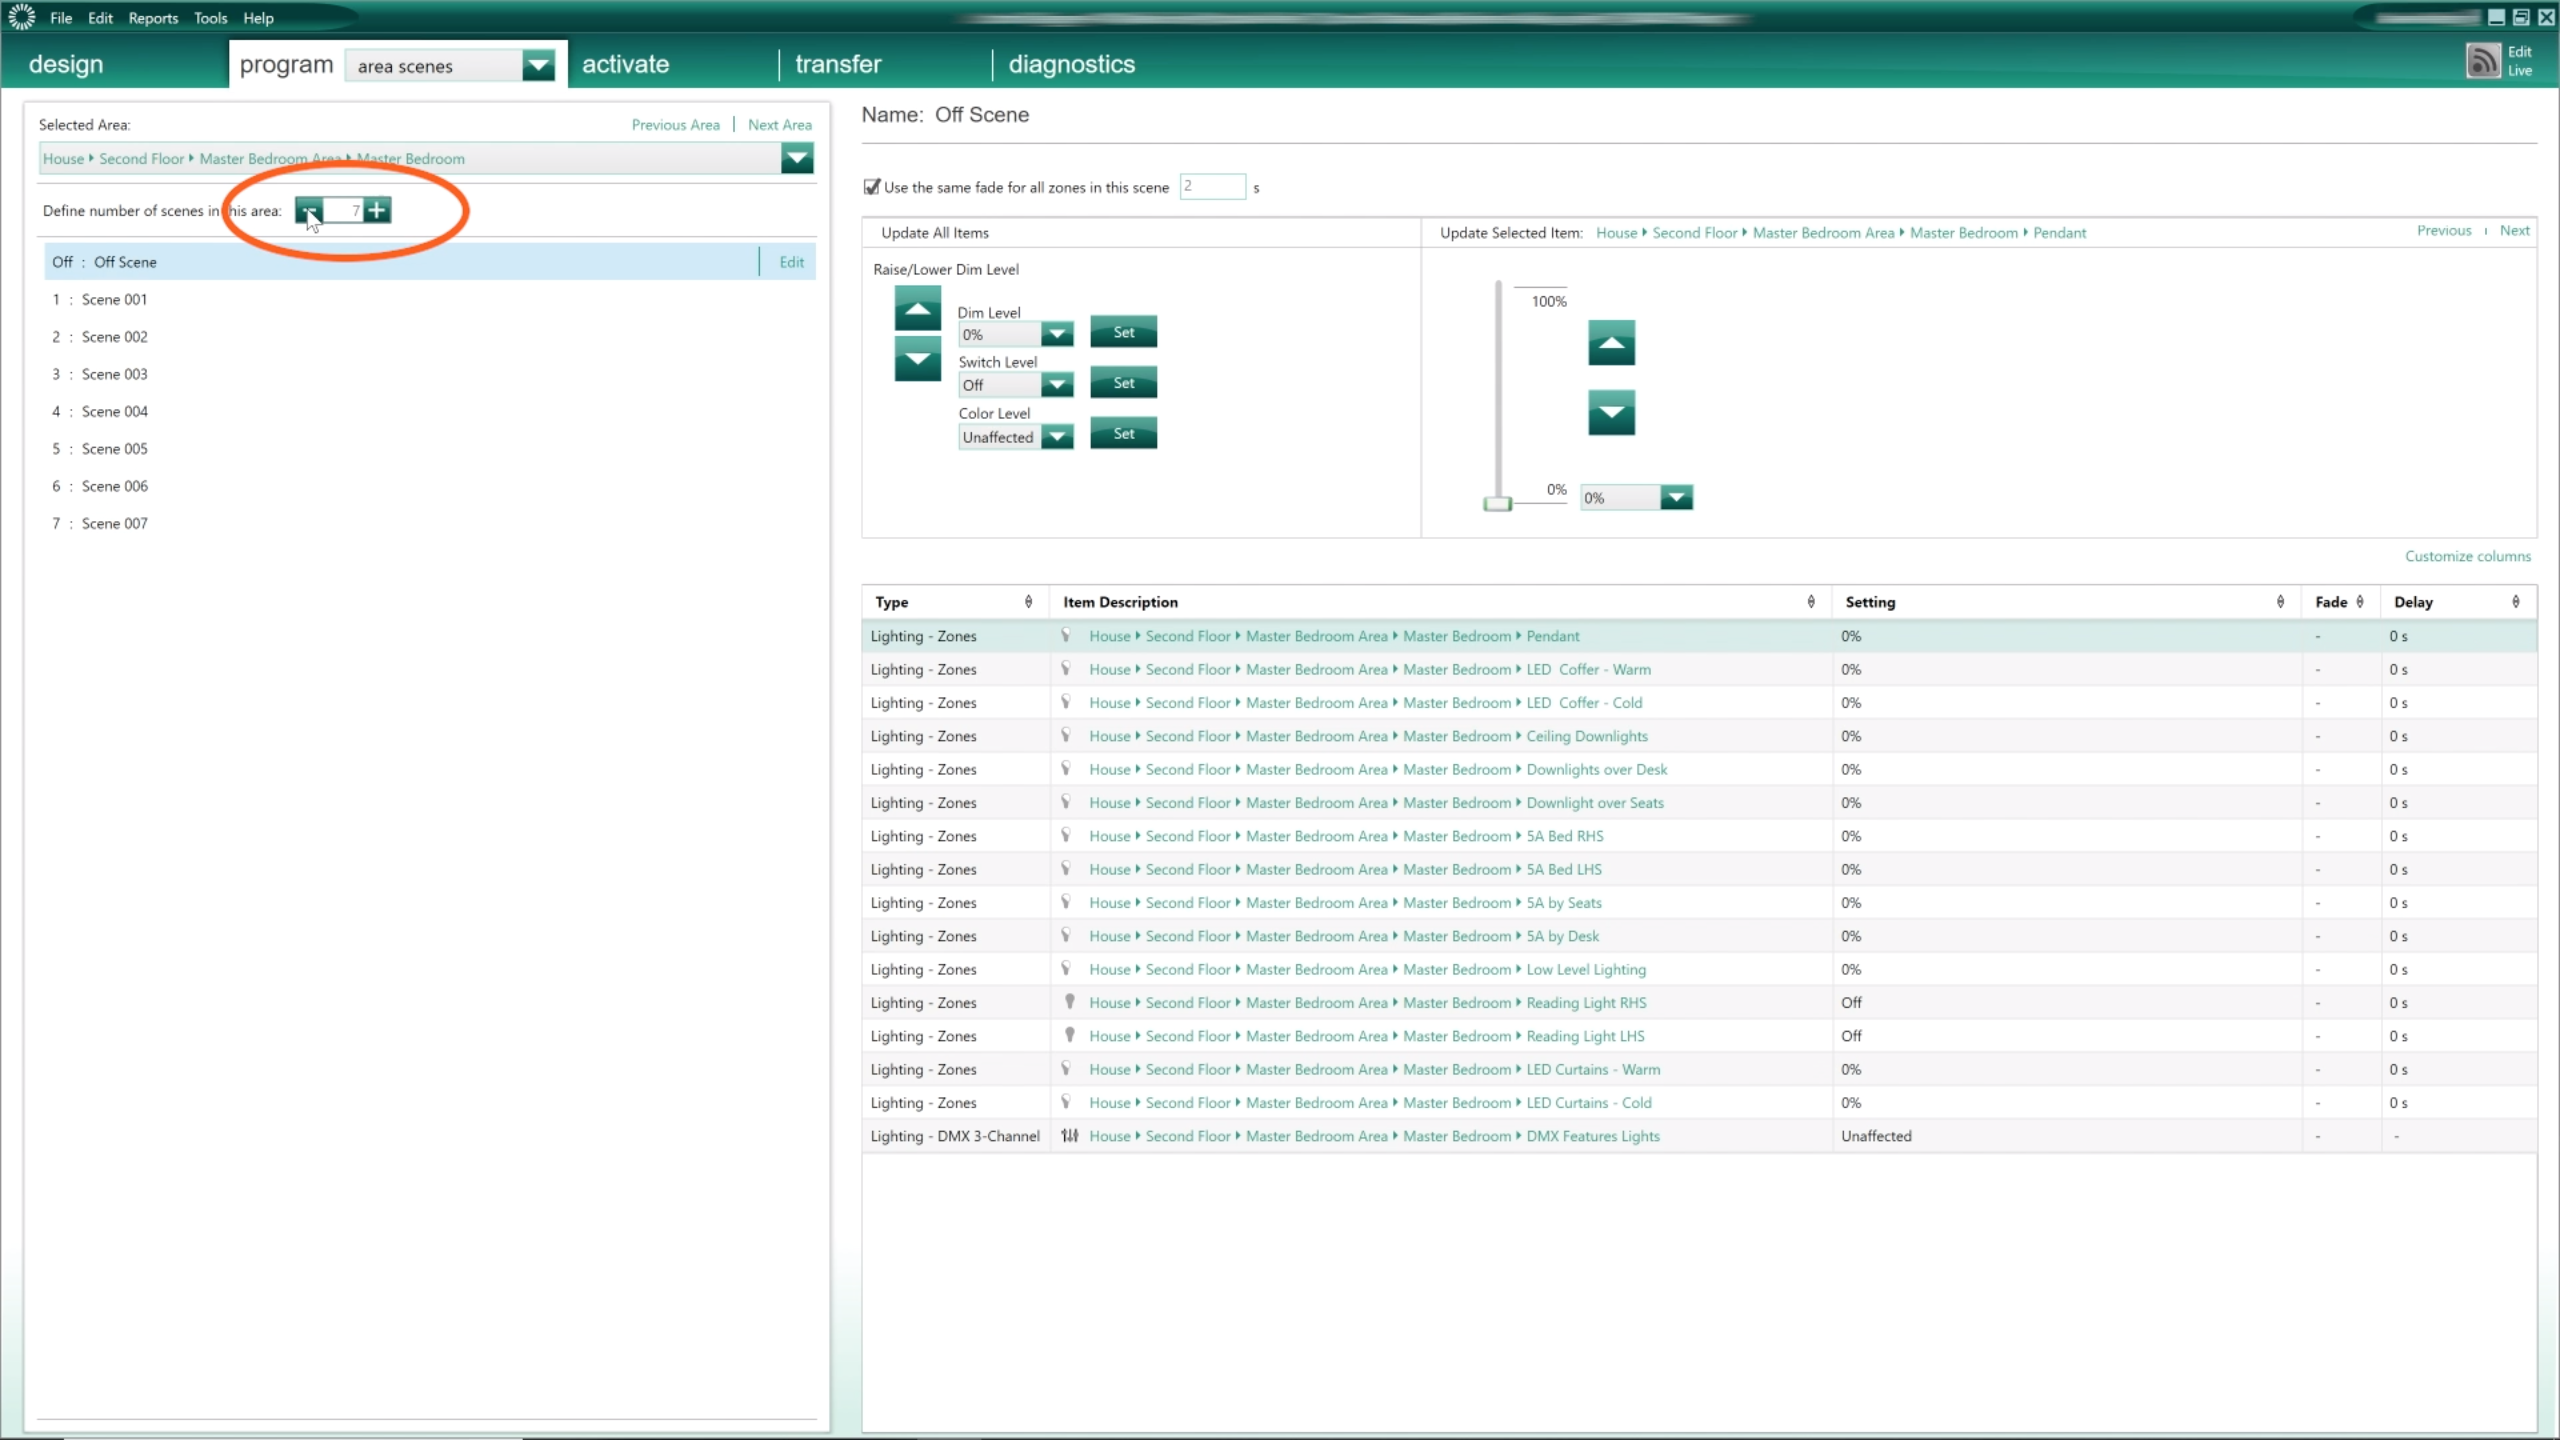
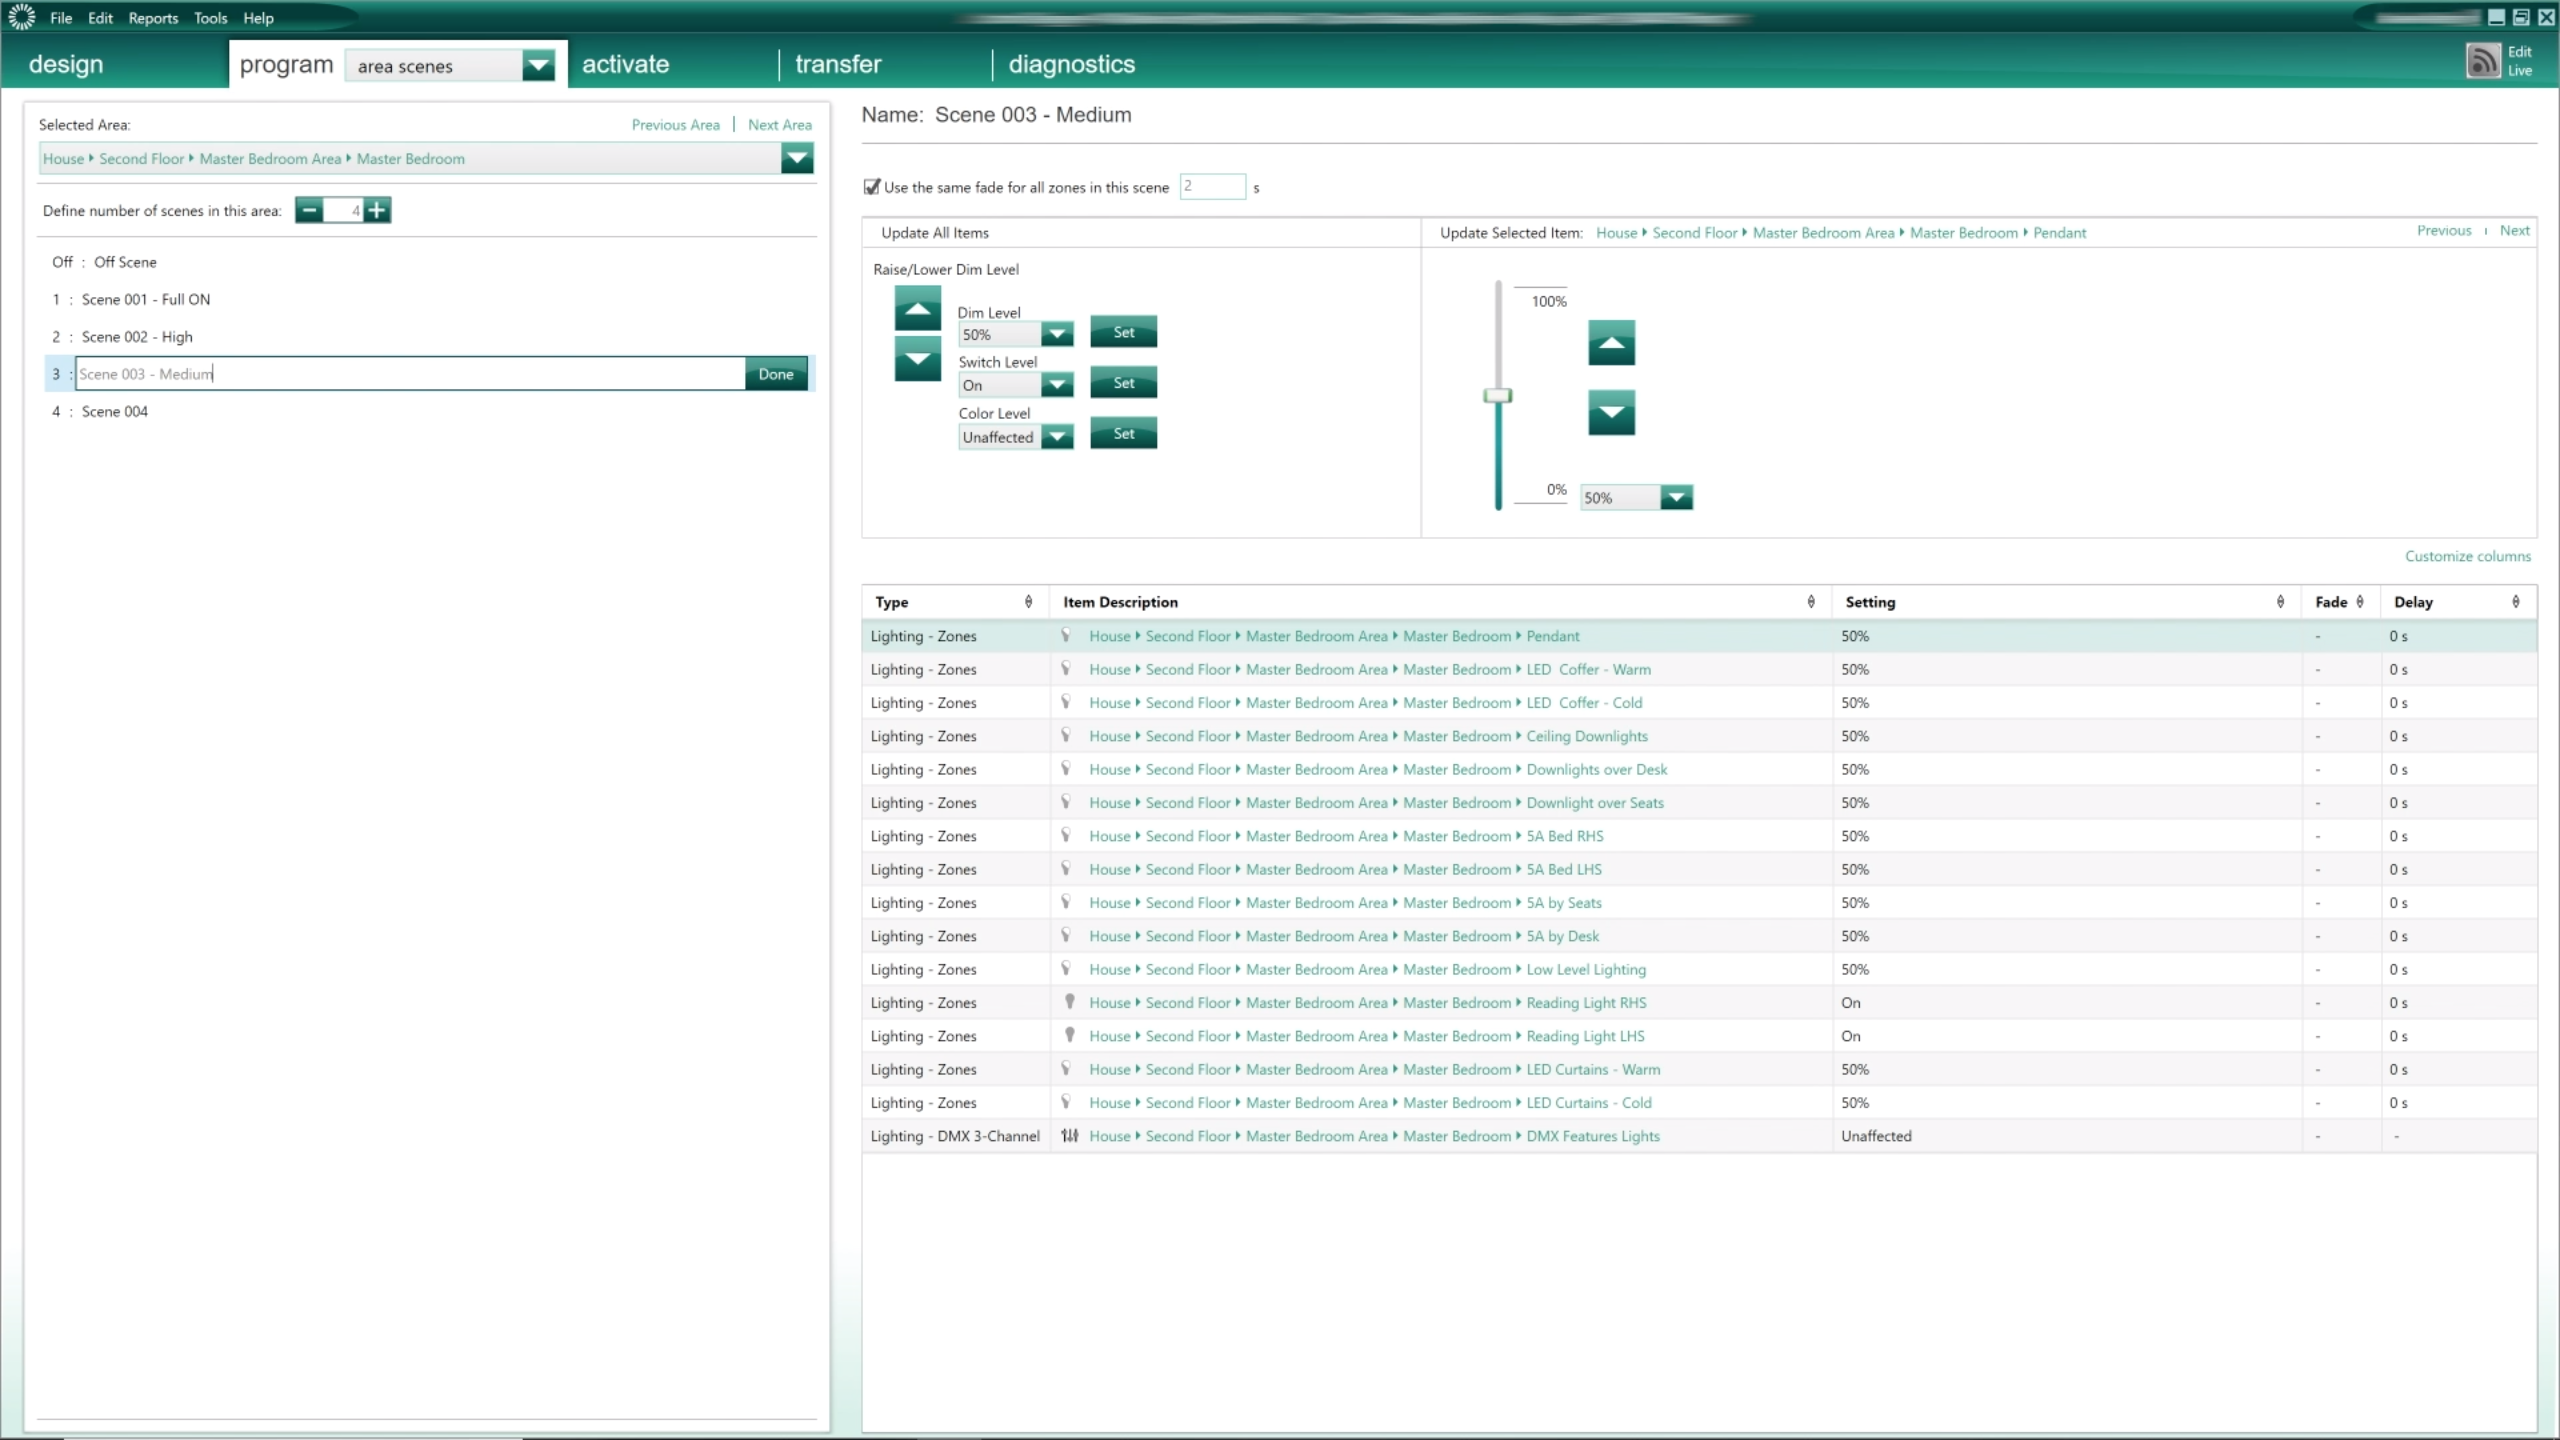
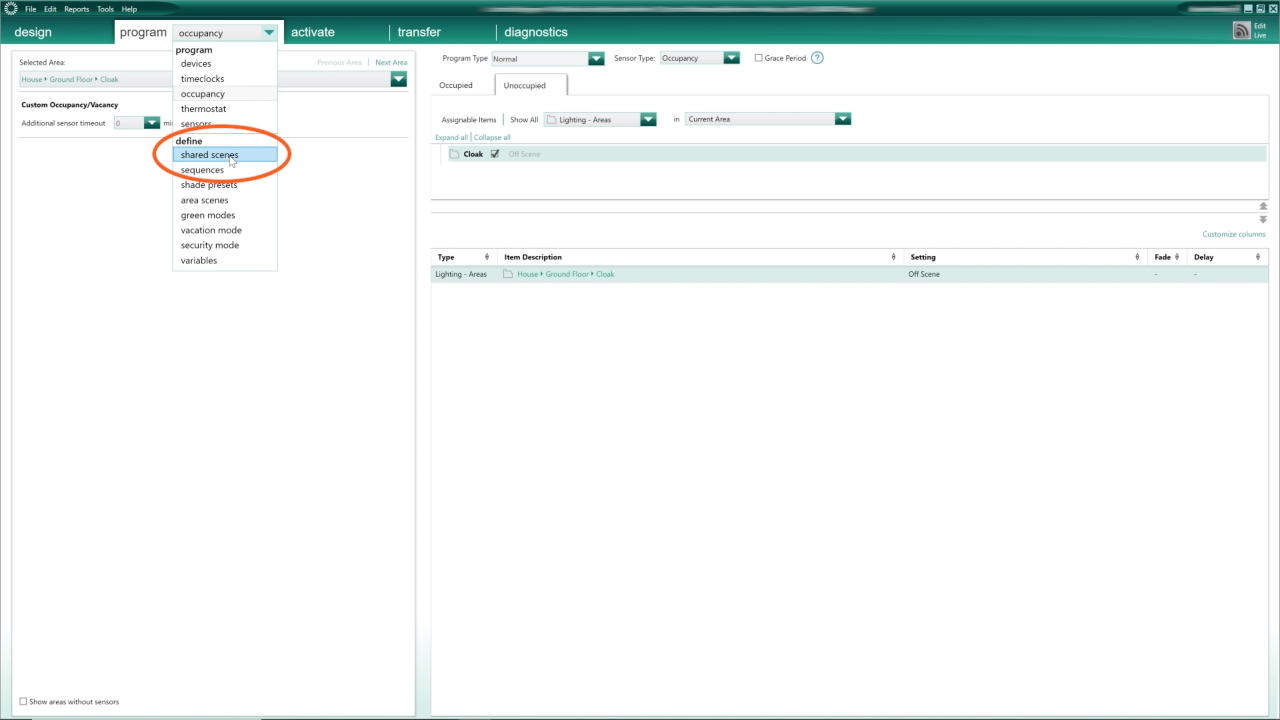
From here, I can add additional “Area scenes”  if I need to, by clicking on the “+” sign on the top left corner. Or delete some of the ones I’ve added by clicking on the “-” sign.   

Please note that the default ones: “Scene 1 to 4” and “Off” cannot be deleted.  

I also like to edit the name of the scenes to give additional information on what they do.  

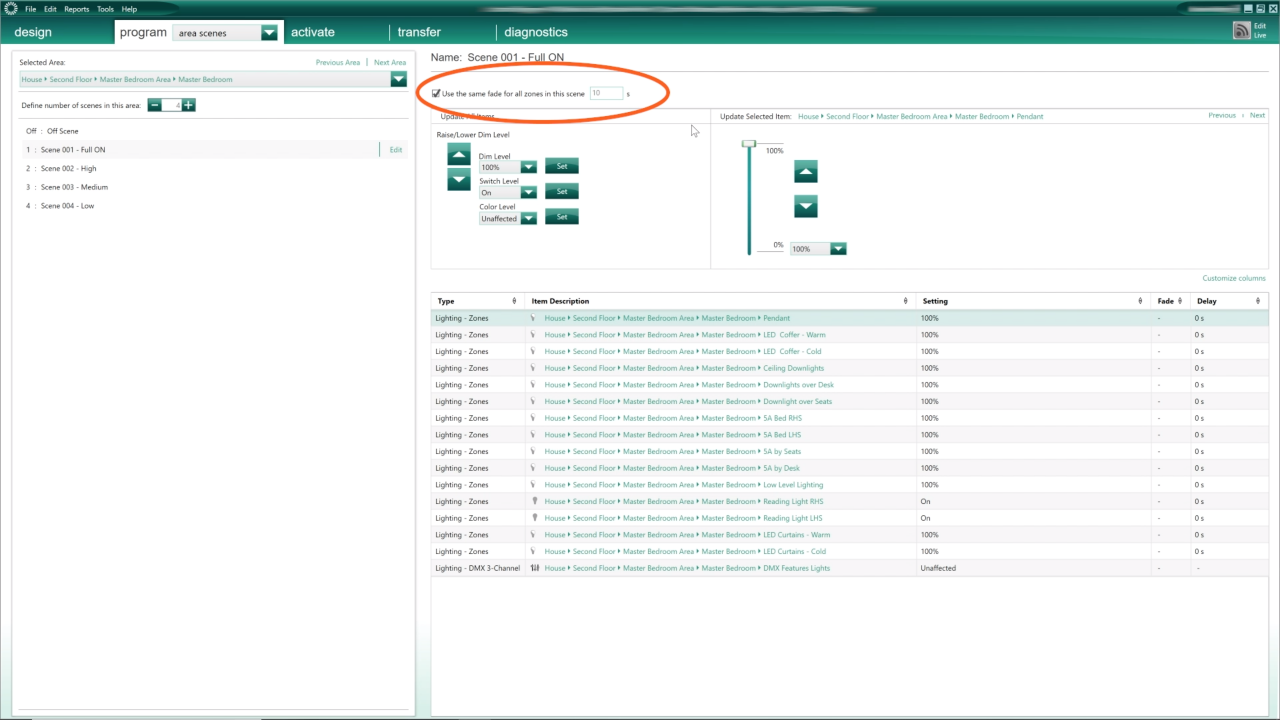
I found that to be very useful during the programming process of my Lutron projects.  

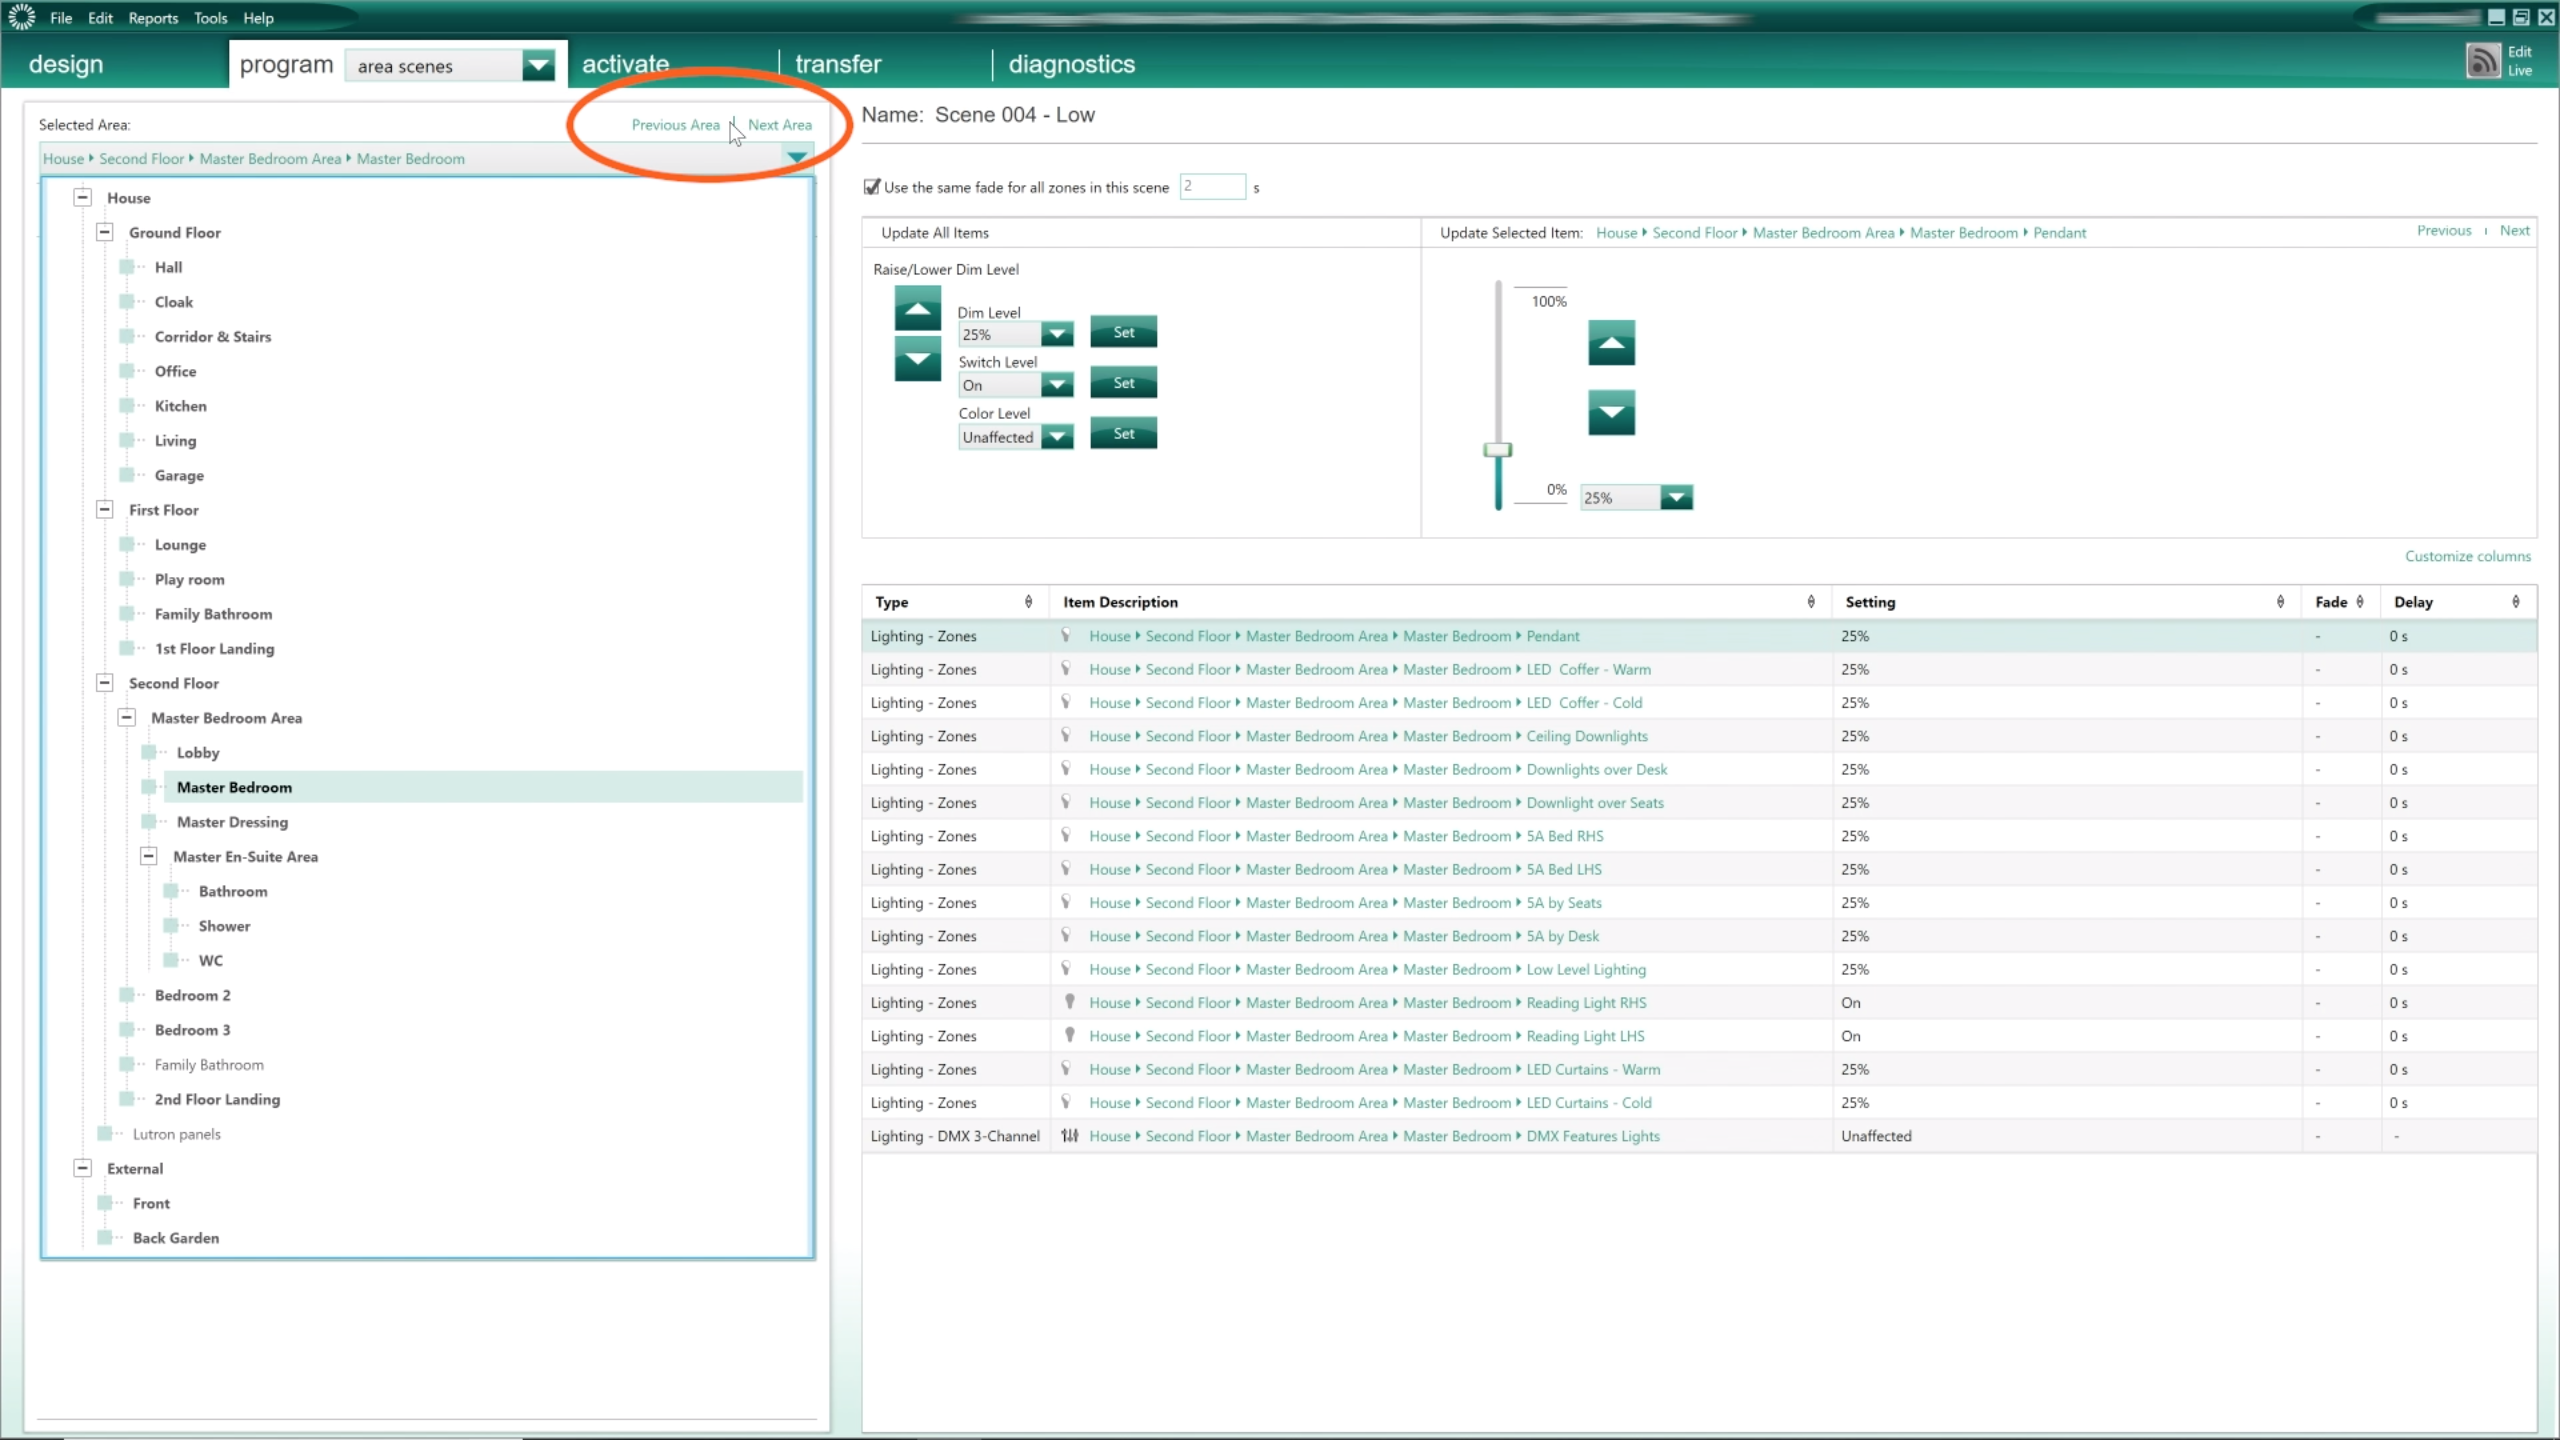
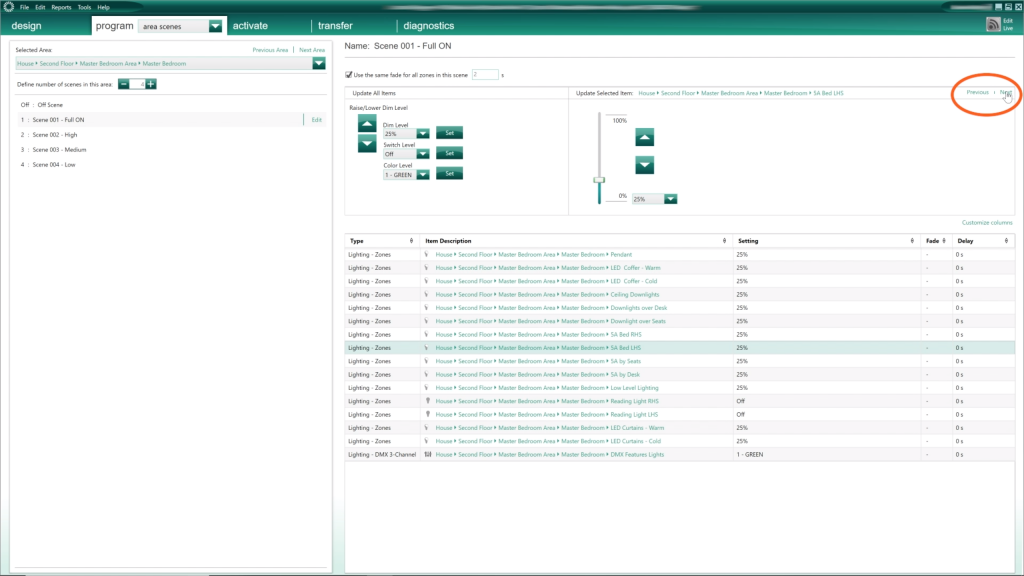
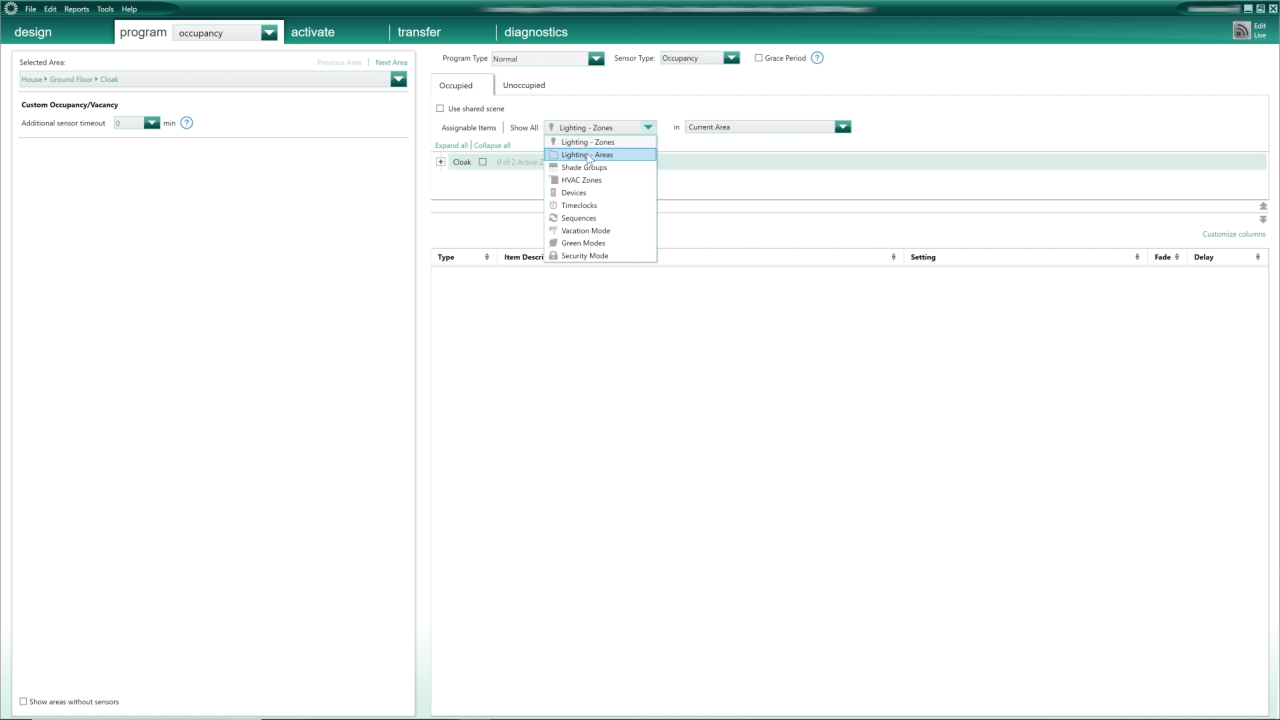
I can also navigate to the various rooms in my database,  either by using the drop down list or by using the “Next / Previous Area” button there.   

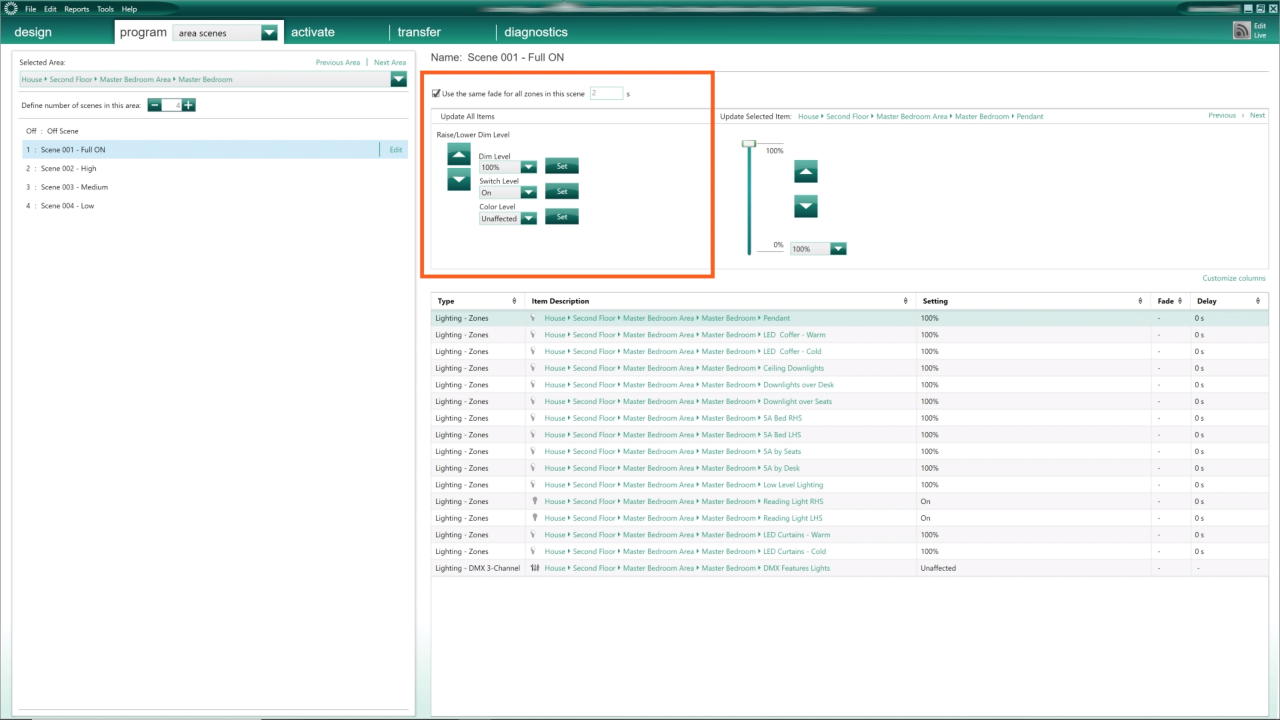
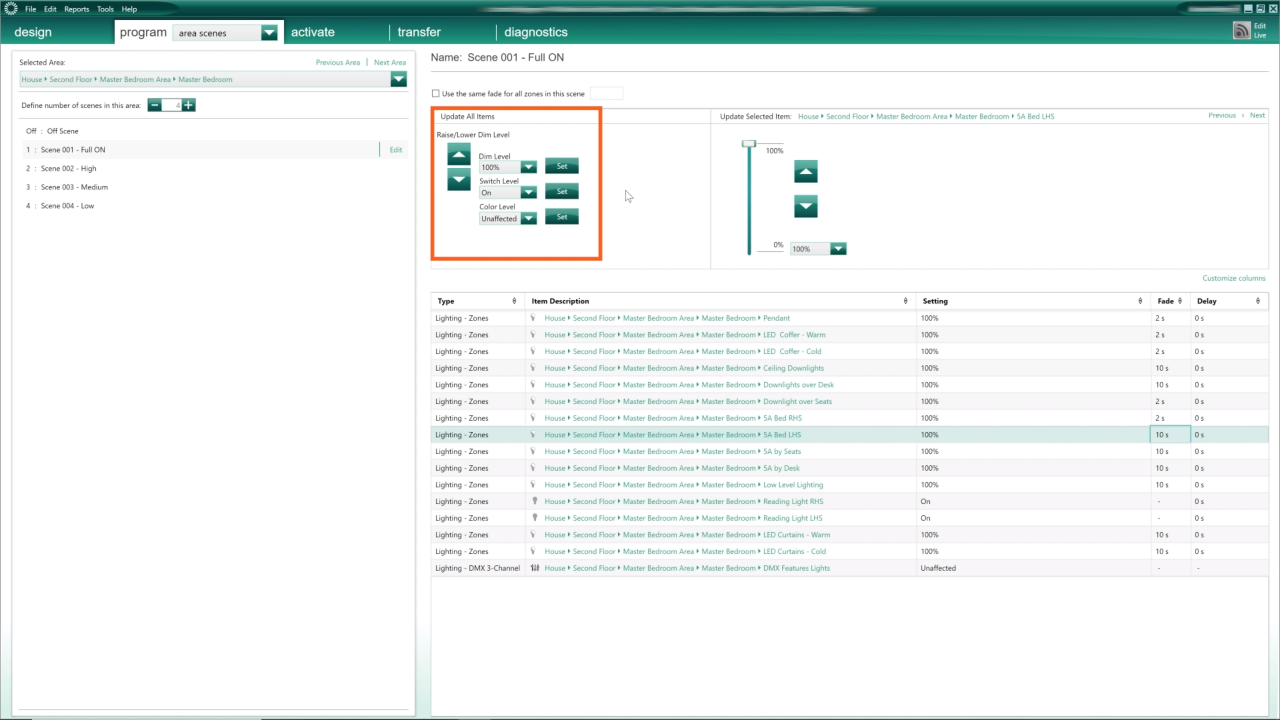
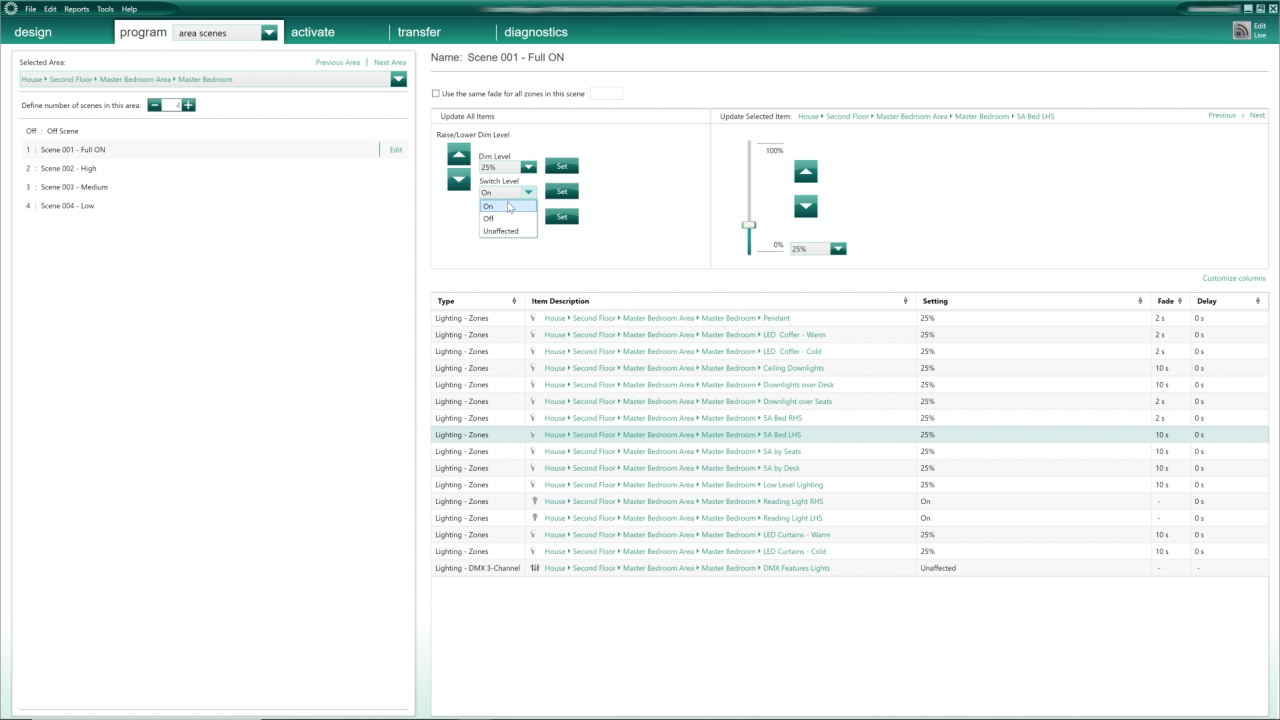
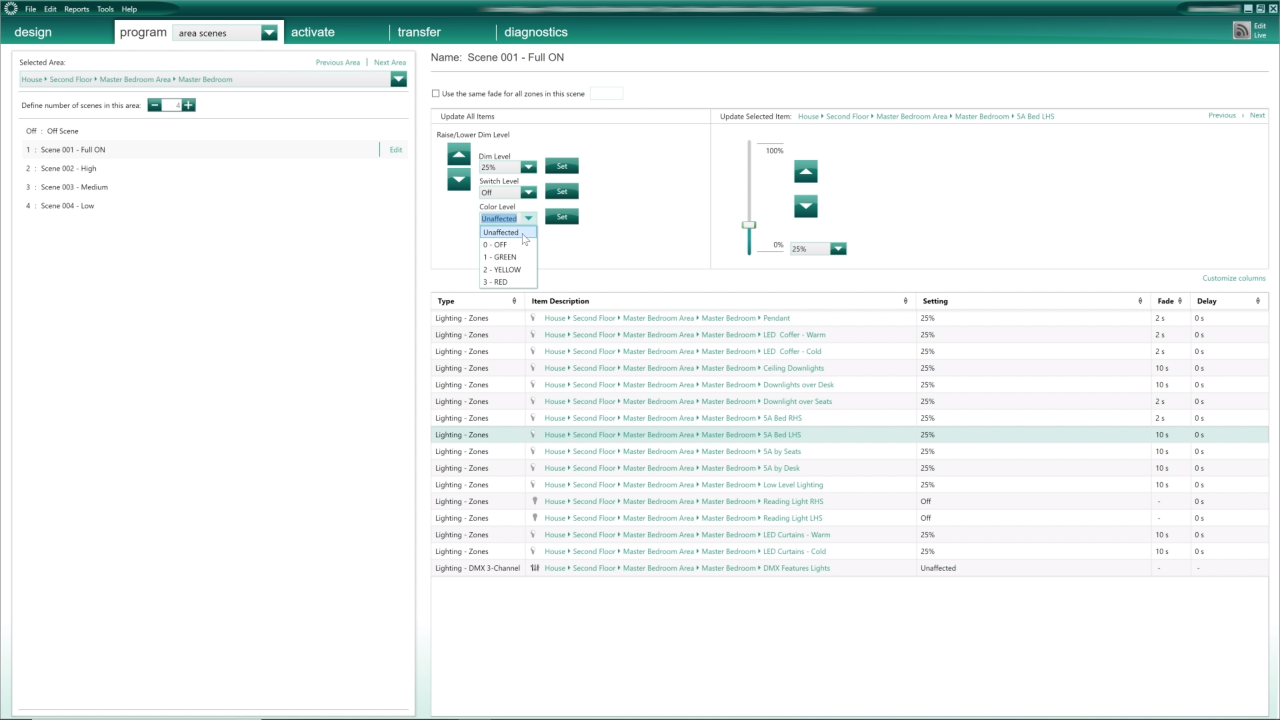
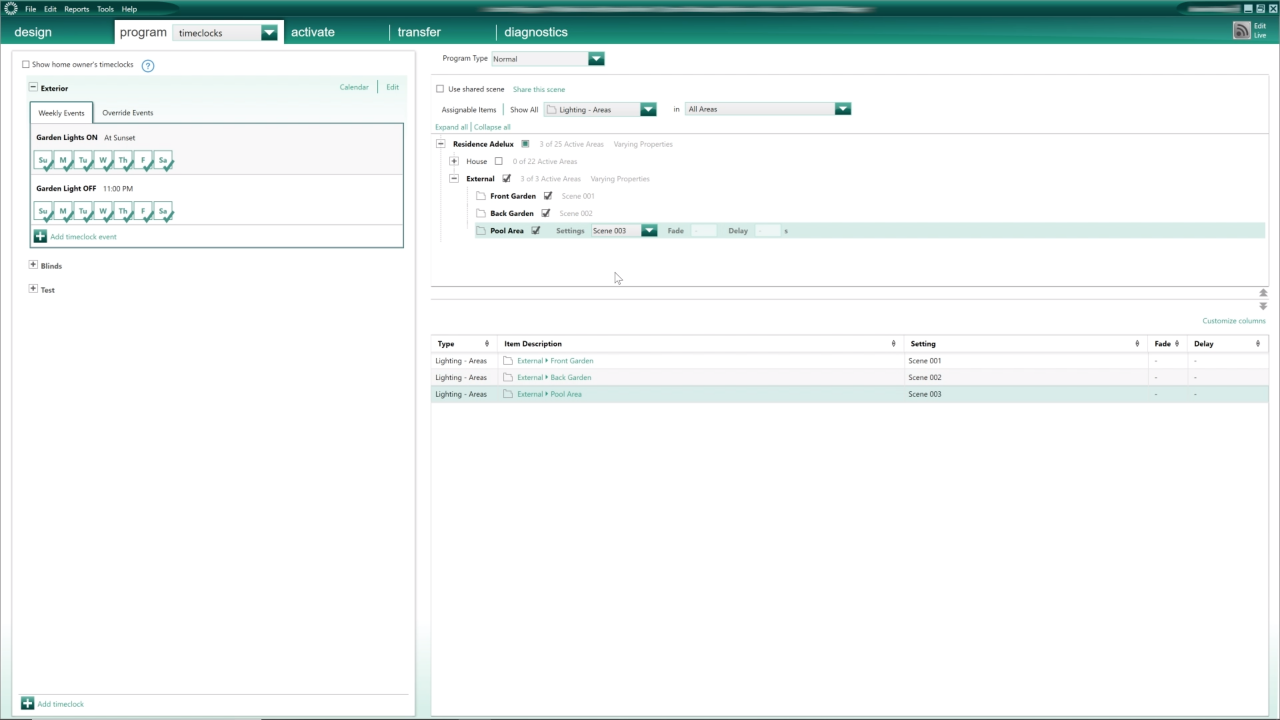
So, at the start of my project, i can quickly set up or update the settings of all my “Area Scenes”,  all in one go,  ready to use later.  

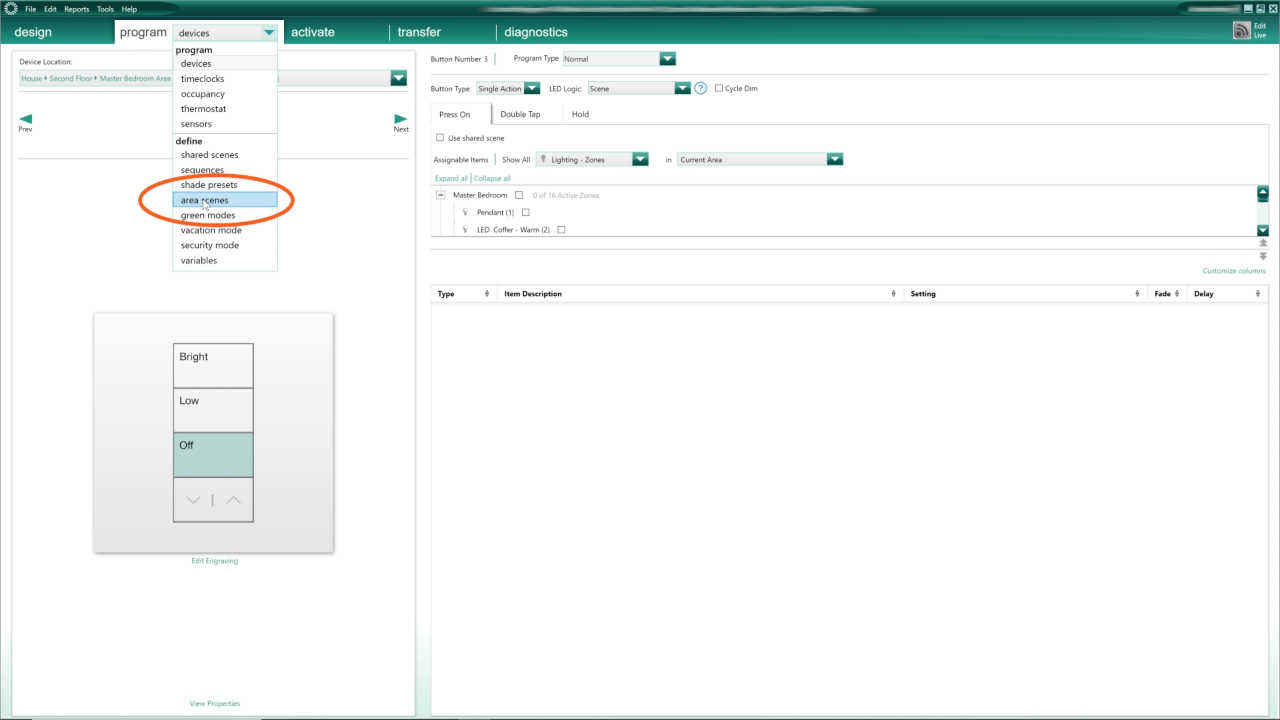
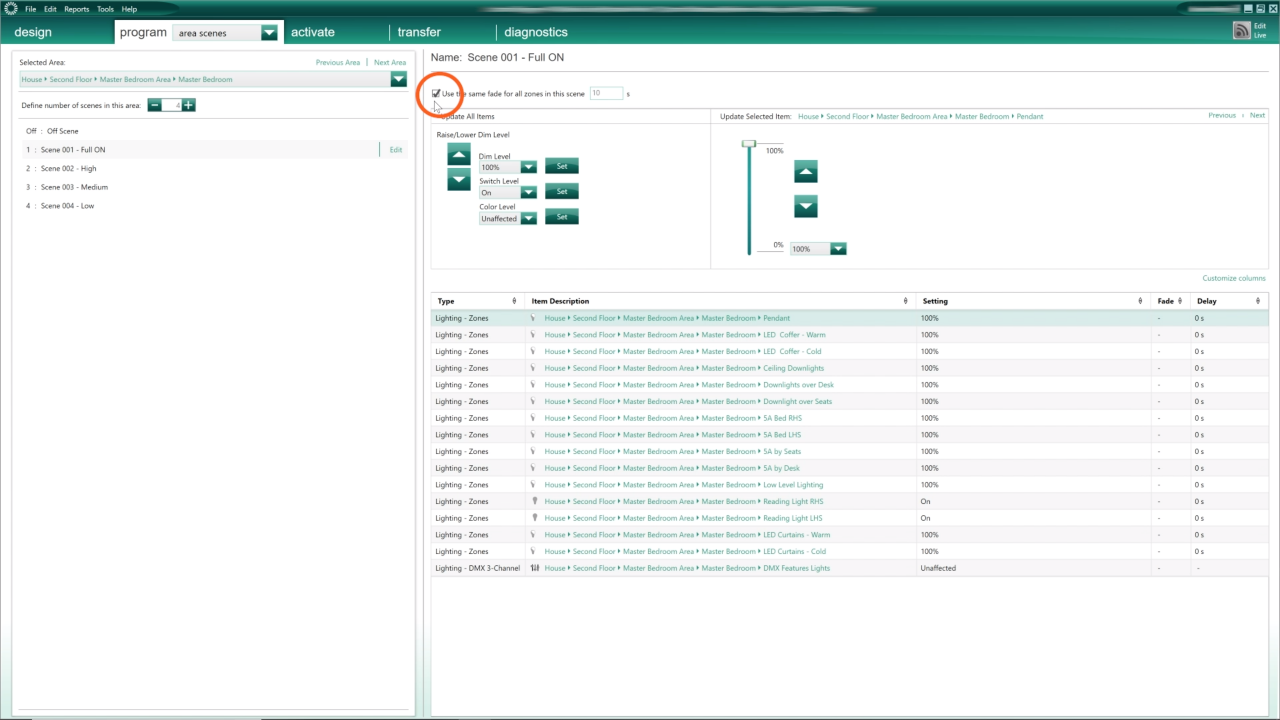
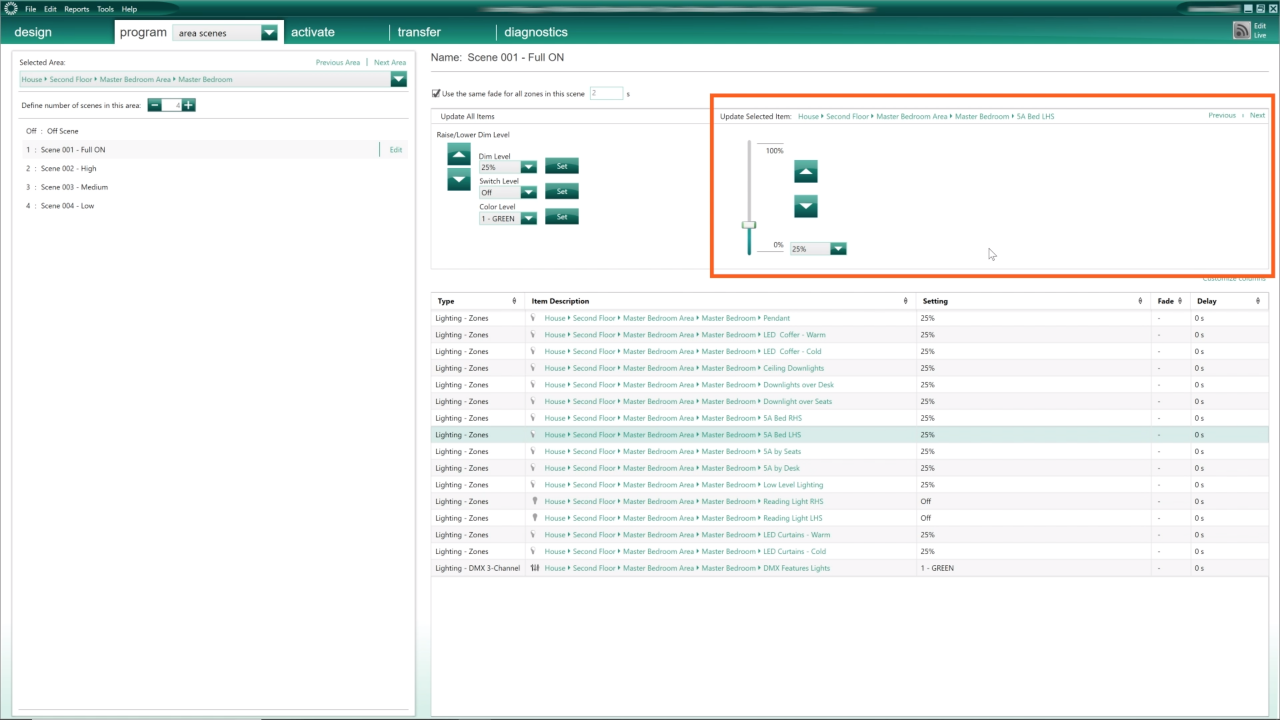
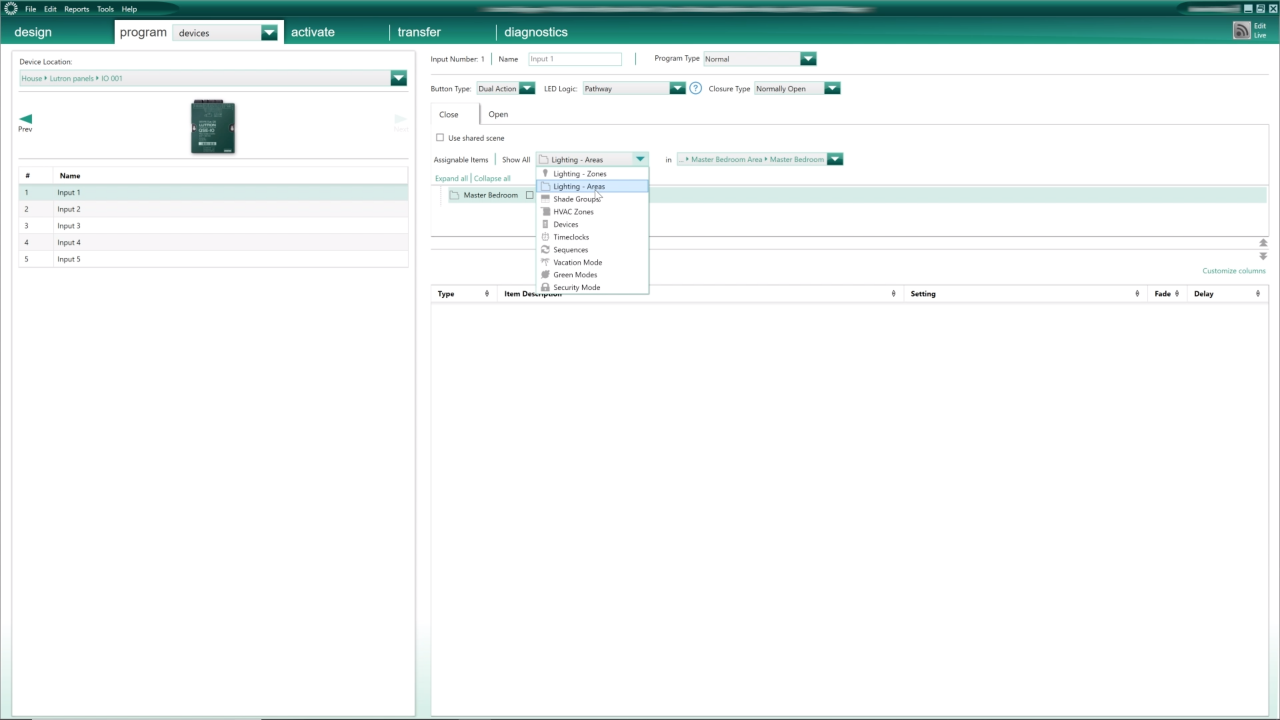
Let me go back to my “Master Bedroom” and select “Master Bedroom Area Scene 1″ ….

Make global edits to an "Area Scene"

The majority of the settings on the right side of the screen are mainly to make quick bulk changes to my “Area Scenes” 

Edit all area scenes in Lutron HomeWorks QS
Click to enlarge

Change "Fade Time"

Change Fade time in area scene in Lutron HomeWorks QS
Click to enlarge
Change Fade time for individual circuit in Lutron HomeWorks QS
Click to enlarge

For instance,  I can change the “Fade Time” for all my lighting circuits in one go,  simply by changing the value in that box at the top of the section.

Or if I want to use different “Fade Time” for each lighting circuits, I can also untick the box, and then make the change I want, directly in the list of circuits below.

Change "Lighting Level"

Next, I can also make changes on the lighting levels also in bulk.  

On the part of the screen, I can, for example change the dim level to 90%, and when I press on the “Set” button all the dimmable lighting circuits will get that new setting. 

I can also, use the “Up” and “Down” arrow to make incremental changes but I need to make sure to press on the “Set” button to apply those changes.  

Alternatively, I can use the drop down list to make quick changes to pre-defined levels.  

Same thing with the “Switch Levels”,  where I can make quick changes to the “Non Dimmable” lighting circuits in that room.  

And if I am using “DMX colour changing loads”, I can quickly apply the same colour to all the DMX zones in that room. 

Edit lighting level area scene in Lutron HomeWorks QS
Click to enlarge
Edit switch lighting level area scene in Lutron HomeWorks QS
Click to enlarge
DMX Setting in Area Scene in Lutron HomeWorks QS
Click to enlarge

Make Single Circuit Edits in an "Area Scene"

single edit Area Scenes Lutron HomeWorks QS
Click to enlarge
single edit Area Scenes Lutron HomeWorks QS

Now, to make individual changes on the lighting circuits, I can use this section of the screen here.  

First, I select the circuit I want to change using the “Next” and “Previous” buttons on the top right corner or by selecting the circuit by directly clicking on it in the list. 

Then, I can use the slider, the “Up” and “Down” arrows, the values in the drop down list or I can type directly the percentage I need in that box here, fallowed by “Enter” to apply the change. 

To be fair, since the changes are not live at this point,  if I were to change the lighting levels on one or many circuits in that area scene for example,  I will simply just go and make the change directly in the list of circuits below.

What I really like to do though, and what I also prefer if I have to change or fine tune my “Area scenes” later on during my project, is to, at that point, “Go Live” with the Lutron Homeworks QS system by clicking on the “Edit Live” button here and make live changes to my “Area Scenes”.  

Edit Live Area Scene Lutron HomeWorks QS
Click to Enlarge

How to use "Area Scene" in the Lutron HomeWorks QS Database

Use "Area Scenes" When Programming "Keypad Buttons"

Once I am happy with the settings of my “Area Scenes”, I can use them at different places in my Homeworks QS database.

I can trigger them from a keypad button by selecting “Lighting – Areas” from the drop down list of assignable items.

Next, I make sure to select the relevant area

and then select the “Area Scene”, I want to use on that button.

Program Keypad with Area Scene in Lutron HomeWorks QS
Click to Enlarge

When Programming "Contact Closure Inputs"

Program Contact Closure with Area Scene in Lutron HomeWorks QS
Click to Enlarge

I can also use “Area Scenes” on Contact Closure inputs.

So here for example, let say that when my contact closure input 1 “Closes”, I want to activate the “Garage / Area Scene 1”.

And when my contact closure “Open” I want to use the “Garage – Area Scene Off”.

Use "Area Scenes" When Programming "Time Clock Events"

I can use “Area Scenes” in “Time Clock”

First, I select the event I want to program, and then I assign the lighting area I want to trigger.

I can also add, multiple area scenes to a single input.

So here for example, when my “Garden” lights turn on, automatically at sunset,  I can trigger “Area Scene 1” in the “Front Garden”, “Area Scene 2” in the “Back Garden” as well as “Area Scene 3” in the “Pool Area”.

Program Time Clock with Area Scene in Lutron HomeWorks QS
Click to Enlarge

When Programming "Occupancy Sensors"

Program Occupancy in Lutron HomeWorks QS
Click to Enlarge

I can trigger “Area Scenes” on “Occupancy”  and select the “Area Scenes” I want, when the room is “Occupied” and select the “Area Scenes” I want, when the room is “Unoccupied”

Use "Area Scenes" When Programming "Shared Scenes"


I can make “Shared Scenes” out of “Area Scenes” and you can click on this link to find out more about it.

Program Shared Scenes
Click to Enlarge

When Programming "Sequences", "Green Mode" and "Security Modes"

Program sequences in Lutron HomeWorks QS
Click to Enlarge
Program Green Mode in Lutron HomeWorks QS
Click to Enlarge
Program Security Mode in Lutron HomeWorks QS
Click to Enlarge

I can use “Area scene” when programming “Sequences”.

I can can also, customise “Green mode” with “Area scenes” as well as “Security modes”.


...And what about "3rd Party Integration"?

A final interesting place to know, where you can find “Area Scenes” is in the “Integration” screen.

First, if you go to “Tools / Configure integration” and then select “Areas” from the drop down list.

What we see here, is that each “Area” has a unique “Integration ID” number that can be used to send command to the Lutron Homeworks QS System to trigger  “Area Scenes” from a 3rd party equipment.

You can find more details about it,  by accessing the Lutron Integration Protocol document from the link on that screen.

Configure Integration in Lutron HomeWorks QS
Click to Enlarge
Configure Integration in Lutron HomeWorks QS
Click to Enlarge

Conclusion

To conclude,  we saw all the various settings available to customise our “Area scenes”.  

Those “Area scenes” can be use to quickly program:  

  • Keypad buttons
  • Contact Closure inputs  
  • Time-clocks  
  • Occupancy sensors  
  • Shared scenes
  • Sequences  
  • Green modes  
  • Security modes  

as well as being triggered from 3rd party equipment  

The main advantage of using “Area scenes”, is that if we need to make a change,  we just have to update the specific “Area scenes” and automatically,  that change will be applied everywhere that “Area scenes” is being used within the Lutron Homeworks QS Software, in one single operation!  


Benefits of using Area Scenes in Lutron HomeWorks QS

There you go!

Voila! there you have it!

How to setup “Area Scenes” and where they can be used within the Lutron Homeworks QS Database. 

I hope you found this tutorial useful. 

Please if you have any question let us know in the comment section below. 

Don’t forget to “Like” and “Subscribe” so you can be updated when the next video is released.  

Good luck and talk to you again, on the next tutorial!

Xavier 

The Video: How to Set Up "Area Scenes" in the Lutron Homeworks QS Software and where they can be used

Learn More About Lutron Homeworks Qs

Leave a Reply

Your email address will not be published.