Lutron RA2 Select Tutorial

Step-by-Step Setup Tutorial

Welcome to this Lutron RA2 Select Tutorial,
This tutorial is addressed to Home Owners, Electrical Contractors, or to anyone to wish to know how easy it is to install and program a Lutron RA2 Select System for the very first time. 

RA2 Select - Demo Setup

To illustrate all the programming steps, we’ve set up a small demo. 
We use 2 table lamps that represent 2 separate lighting circuits. 

RA2 Select Table Lamps Adelux
Click to enlarge
Click to enlarge

We use a Lutron– RA2 Select Starter kit (ref: RRK-KITREP-2D) that contains everything you need, to start using that system. 

  • It comes with 2 in-line Dimmers (Ref#: RRK-R25NE-240). 
  • A RA2 Select – Main repeater (Ref:RRK-SEL-REP2-BL).
  • 2x Pico Remotes (Ref#: PK2-3BRL-TAW-L01) and 1 x Pico Scene keypad (Ref#: PK2-4B-TAW-P03). 

As well as few other bits… 

If you want to have the full details of what the kit contains, we’ve done an Unboxing video, and you can find the link Here

RA2 Select In-Line Dimmers Wiring

The first step, is to wire the Lutron – RA2 Select In-line dimmers. 
Please note that this has to be completed by a certify electrician and in accordance with your local regulations 
 
  • I will start with switching off the breaker for the lighting circuit where I need to install the in-line dimmer on.
  • Then, I get the mains feed coming in and wire it as shown on the installation instructions that are coming with the unit.

 Next,

  • I wire the cable that goes out to my light fitting if i’ve got a single one (like a single pendant or a table lamp – as in our demo). Or to the first one, if I have multiple fittings that belong to the same lighting circuit (Like a circuit made of multiple downlighters for example) 
  • Then, I screw the strain relief that is also supplied with the unit. 
  • To Finish, I place and screw the top cover.  
Lutron RA2 Select in line dimmer wiring
Click to enlarge
Lutron RA2 Select Adelux In-line dimmer Flashing
Click to enlarge
Then, I’ll turn my breaker back On. 
 
  • At that point, I can test my wiring by pressing on the On/Off button on my inline dimmer. I notice that the Light turns straight ON and then dim to Off.  So I guess my wiring is correct – Which is great!
  • To finish, I’ve have also wired the second In-line dimmer to my other table lamp; and the wiring test is Ok on that one too

RA2 Select App Set up

Lutron RA2 Select App Get Started Adelux
Click to enlarge
Let’s setup the RA2 Select App
 
  • So First, I’ll install the Lutron RA2 Select app, from the Apple store. This is because I’m using an iPhone and iPad, but this app is also available from the Play Store. 
  • Then, I’ll make sure my phone is connected to the Home Wifi network. This is the Network to which my RA2 Select –  Main repeater will be ultimately connected to.
I’ll have to create a Lutron account.
 
  • This will allow for the App to communicate with My RA2 Select – Main Repeater using Cloud services. 
  • So first, I select the country where this RA2 Select system is installed – in my case I’ll select the United Kingdom 
  • Then, I’ll have to Enter my email address. 
  • And Create a Password 
  • Then, Click on “Create Account” 
  •  
 
Lutron RA2 Select Create Account Adelux
Click to enlarge

RA2 Select Main Repeater Setup

The Main Repeater is the central element of the Lutron RA2 Select System.

You only need One Main repeater for your home.  It will allows for setup, control and monitoring via the Lutron RA2 Select App.

  • Let’s power the unit from the power supply provided.
  • Then, Let’s connect the ethernet cable also provided, at the back of the repeater on one end, and to the back of my wireless router on the other. Or, if it’s the case, to my Ethernet switch of my home network. 
  • I click “next”, and I see that the app is now trying to discover my Lutron system.
  • Once found, the App asks to Press on the button at the back of the repeater – called the “Add” Button. 
Lutron RA2 Select Main Repeater Adelux
Click to enlarge
Lutron RA2 Select Time & Location
Click to enlarge
  • Next, the App request My time zone and location as this will help for functions like “Geo Fencing” and “Time clock programming”. 
  • So, I click on “Allow”. The app is now showing my Time Zone and “My Home” or “Project” Location.
  • Then, I click “next” to save those settings to my RA2 Select system.

Get Ready to Add Devices

Then, the App gets ready to add devices and takes me automatically to the “Add Device Screen”. 
 
From There, I have access to all the Lutron and Non-Lutron equipment that can be added to the RA2 Select – System
Lutron RA2 Select Adelux
Click to enlarge

Add RA2 Select In-Line Dimmers

2 Ways to add In-line dimmers

Lutron RA2 Select Add In-line dimmer
Click to enlarge

So Let’s start adding our In-line dimmers by clicking on their icon. 

  • The App actually shows that there are 2 ways to do it. 
  • The first one is by letting the system Looking for the inline dimmers.
  • The other way is to add the dimmers by pressing on the physical button on the dimmer itself. 
     
So since we have 2 in line dimmers; 
  • I’ll Add the first one with the “Find InLine Dimmer / Switch” Method.
  • I will add the second one by pressing on its button. 

Add the first In-line dimmer

So lets start with the first one…

  • The app search and find my 2 in line dimmers. Once it has finish searching it gives me a list of all the in-line dimmers or switch modules that it has found.
  • From there, we can test flash – inline dimmers from those buttons on the side. This is very helpful to correctly ID our devices. 
  • Once I’m Happy with the device Im currently flashing, I’ll click on “ADD” 
 
Now, the App is asking to choose the room where this light is located
    • As you can see there is a long list of predefined rooms.
    • I can also add a Room with a specific name that is not on the list, if I want to.
    • But here Let’s select “Living room” as an example….and click on “Next” ….
Lutron RA2 Select In-line Serial
Click to enlarge
Lutron RA2 Select Adelux
Click to enlarge
On the next screen, the Lutron App asks to choose the type of light this dimmer controls. 
  • Here again, I have a list of light types such as “Ceiling Lights”, “Cove Lights”, “Spot lights”, “Pendant” etc…so if you select one of those the App will automatically name the light, assign it to the room with the correct Icon and you’ll be good to go…
  • As I’m using a “Table Lamp” and there’re none in the list so I select “Others” and select “Decorative Light” – as the description seems to match my Light type.


Then , the App asks me to give that Light a “Name” of my Choice.
  • So I type in “White Table Lamp”and select the appropriate “Table Lamp Icon”… and click “Next” ….
  • The lamp has now been added and quickly flashes. 

Add the second In-line dimmer

Now, let’s Add my second Inline Dimmer. And click on “+Add another Device” button, Select “Inline dimmer/Switch” 
  • As we said earlier, for this one we are going to press on the button on the in line dimmer itself.
  • The LED on the dimmer is currently flashing to lets us know that the dimmer is in assignment / Programming mode.
  • I now press on that button until the LED Flashes Quickly.


Once it has been added, the App goes automatically to the next Screen.
 
  • So I can choose where this light is located, and I choose “Living room” again.. click “Next”…
  • Select “Decorative Lights” … Click “Next”… Give it a Name Like “Black Table Lamp”…and select the “Table Lamp Icon”… and click on “Next” …
  • The table lamp quickly flashes to let us know that its assignment is now complete.
  • Now that I’m done with my inline dimmer, I select “ Im done adding devices” button. 
Adelux Lutron RA2 Select In Line Dimmer
Click to enlarge

Test the In-line dimmer

Adelux Lutron RA2 Select Light
Click to enlarge
Now back onto the “Main screen” and under the “Devices” tab,  I can see my 2 in-line dimmers I’ve just added. 
 
From there, I can quickly test and see how it looks like when I operate my lights from my Lutron RA2 Select App.

So let’s select the “Black Table Lamp”

  • At the top, I have the information on the Current Light Level….in this case ON 
  • Using the Icons on the side, I can turn the Light “Off” and “On”.
  • I can also use the slider to adjust the light level to my liking.
  • And I note that the Light level at the top, follows in real time, which is great !

Add RA2 Select "Picos" Remote Controls

Adelux Lutron RA2 Select Demo
Click to enlarge
Now, lets Add my Picos
 
Since I have 2 Picos and 2 lighting circuits  (where here, each circuit is represented by one Table Lamp controlled via its own in-line dimmer). Ultimately, what  I try to do is to have each Pico to control its own table lamp.
 
So Let’s program that and see what we discover during this process….

Add the first Pico

Same thing here. Let’s click on the “Settings” Icon and then “Add Devices”. This time I’ll select “Pico remote”.
  • The App indicates that I need to “Press & Hold” the bottom Button for 10 seconds until the LED Blinks quickly, which I do now…


Here again, once the App finds the Pico,  it moves automatically to the next screen. Where I’ll have to assign that Pico to the room is in.
  • So I’ select “Living room” as the light I want it to control is also in the Living room
  • Click “Next”
Adelux Lutron RA2 Select Add Pico remote
Click to Enlarge
Adelux Lutron RA2 Select Pico Type
Click to Enlarge
Now, the App asks what type of device does that pico will control.
  • so I select “Lights”
  • click “Next” …
  • and my Pico has now been added.

Add the second Pico

Then, let’s Add the second Pico. Same thing,
  • I click on “+Add Another device”
  • Select “Pico Remotes”
  • press 10 second on the bottom button of that second pico …
  • Select “Living Room” here again
  • Click “Next”
Adelux Lutron RA2 Select Add Device
Click to Enlarge
Adelux Lutron RA2 Select Pico Name
Click to Enlarge
Now because there is an other Pico already in that room, the app asks to confirm the name for that second one…
  • For the moment I’m going to leave it as “Pico 2” 
  • Click “Next”
  • This Pico will also controls the lights in my “Living Room” so I select lights
  • click “Next”…
  • and I’m done with adding this second Pico – very easy!
 
I then exit that screen  by clicking on the “Im done button”and I’m back to the “Main Screen” where my 2 Picos have been added to my Living room.

Test Picos

Adelux Lutron RA2 Select Demo Pico
Click to Enlarge
Now let’s test my two Picos!
 
The first thing I notice,  is that both Picos operate both lamps!
 
OK this is not what I want yet, but I’d like to pause here for a second as I found this basic setup quite useful.
 
Maybe not in this curent setup, but imagine you have a room with a certain number of lights and 2 doors to access it. That could be a “Living room” but also a “Corridor” or a “Stair case”.
By default,  the system has managed and pre programmed for us the “2 ways switching” or “2 ways dimming”. 
So I can have a a pico at the bottom of the stairs that Turns a set of Lights ON….and the other one, At the top of the stairs from where,  I can Turn them Off – or even Dim them!
I didn’t had to do any specific programming for that – by just following the Basic instructions the Lutron RA2 Select system has automatically pre-programmed that for us.
 
This is Great & Convenient and allow for quick system programming for whoever program a  RA2 Select system –  e ither be a Home owner or a Contractor.
 
By default, any Pico set to operate “Lights” in a Room….. will operate All the Lights – Which means, all in line dimmers  in that Room – Very Good!
Adelux Lutron RA2 Select Demo Lamps
Click to Enlarge

Fine tuned Pico Programming

Now, let’s find out how I can program my Picos to control their own Table lamps, Respectively, as I originally stated. 
 
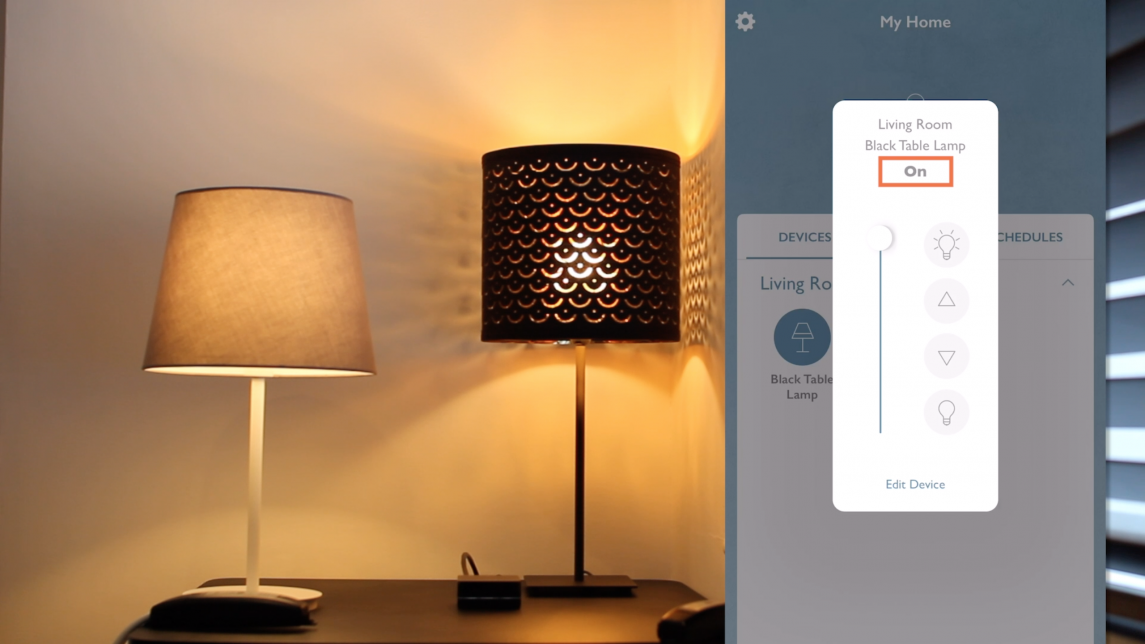
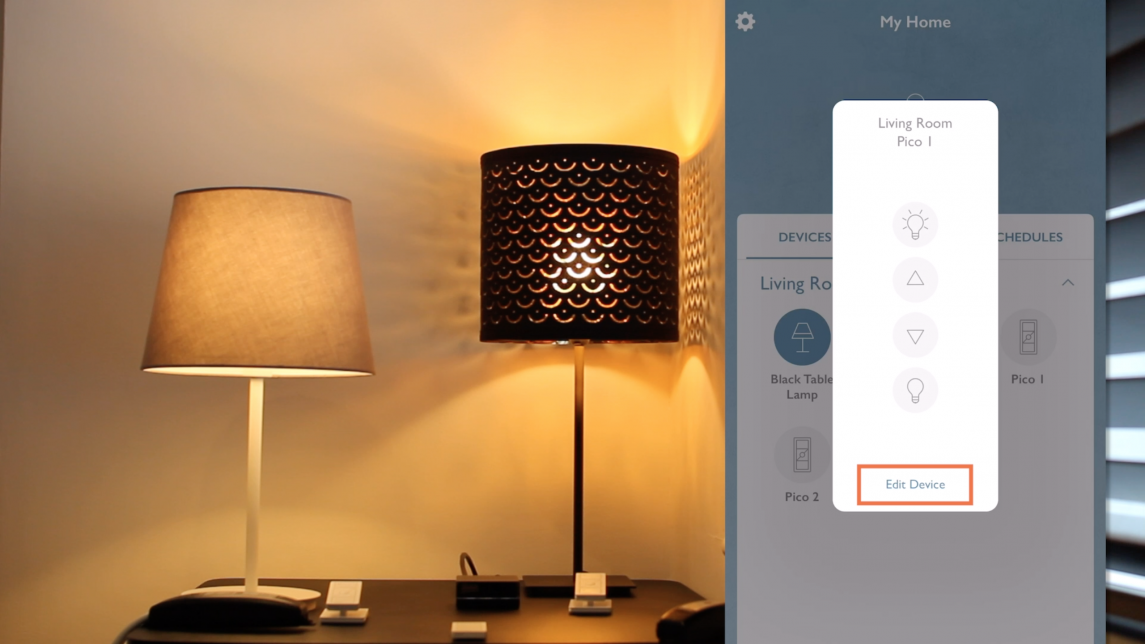
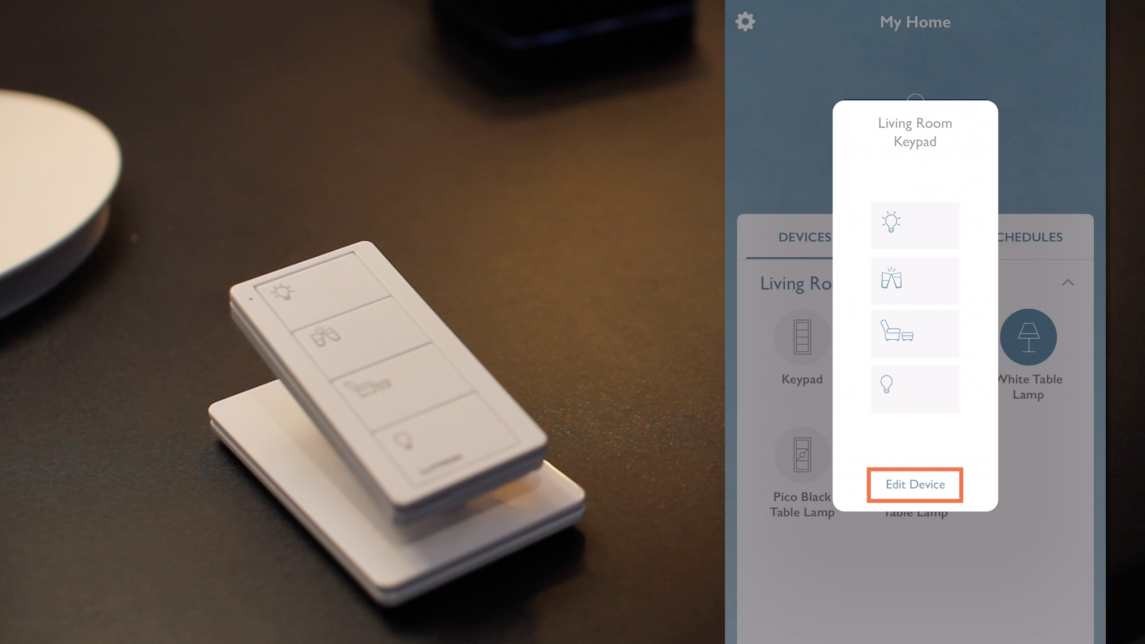
I’ll start with my Pico 1 and select “Edit Device”
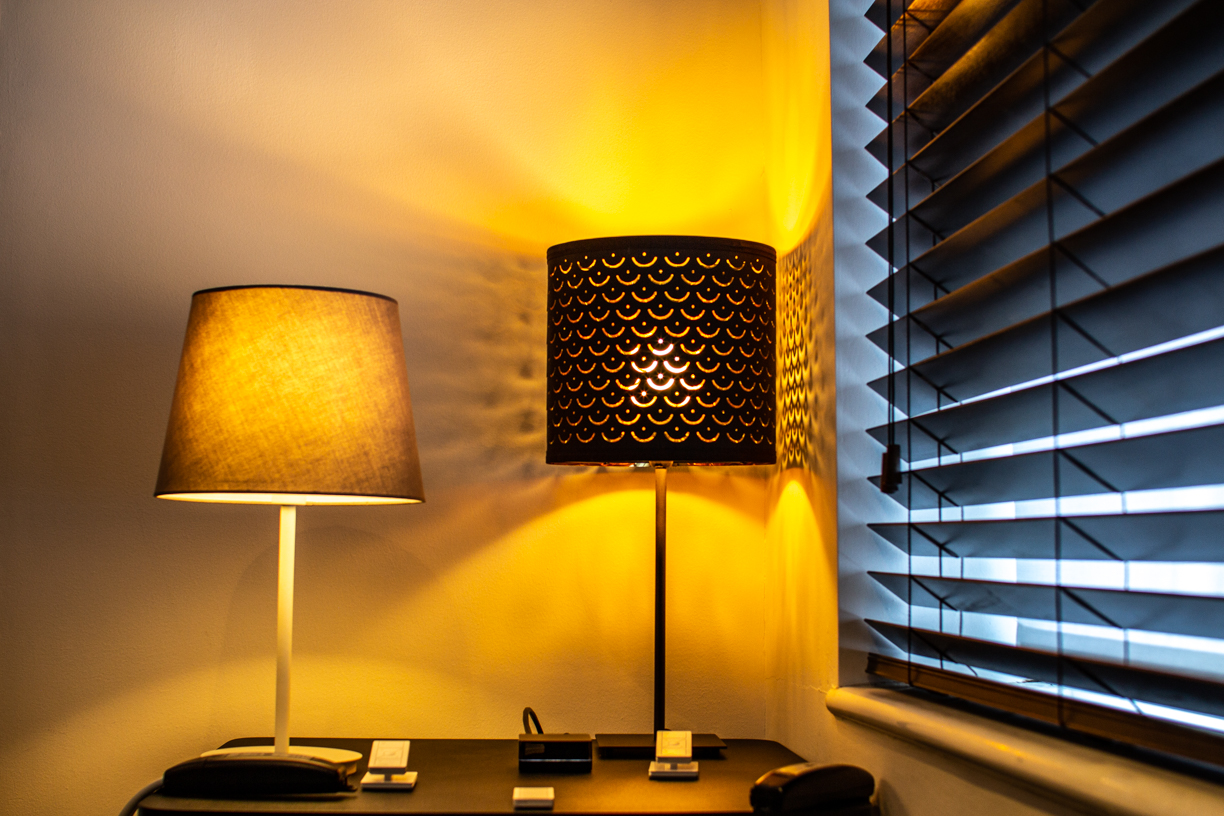
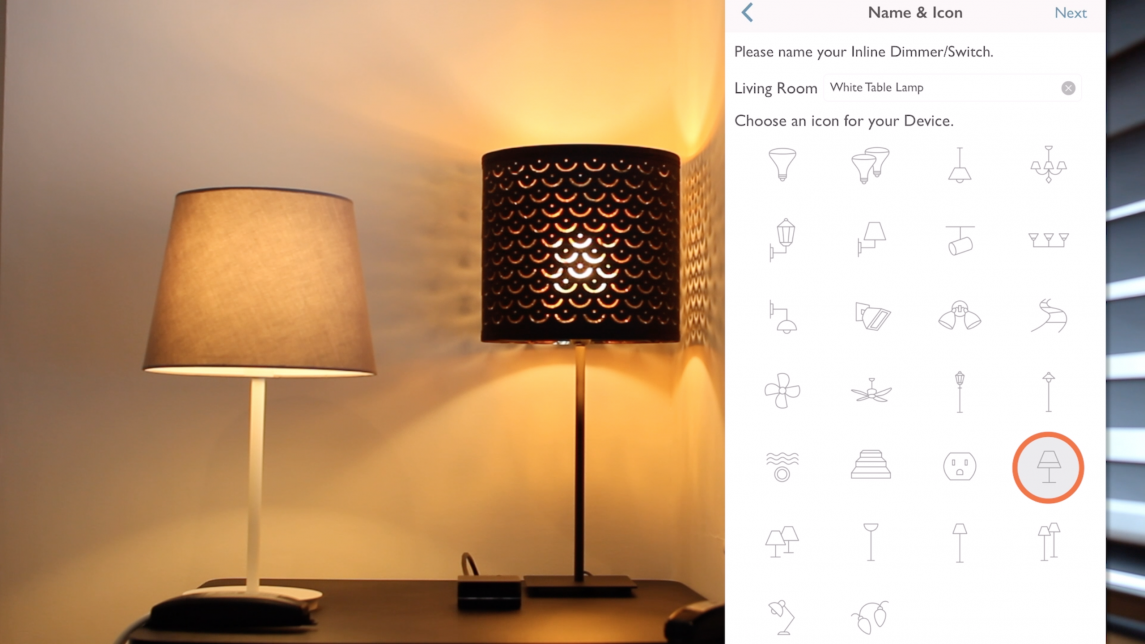
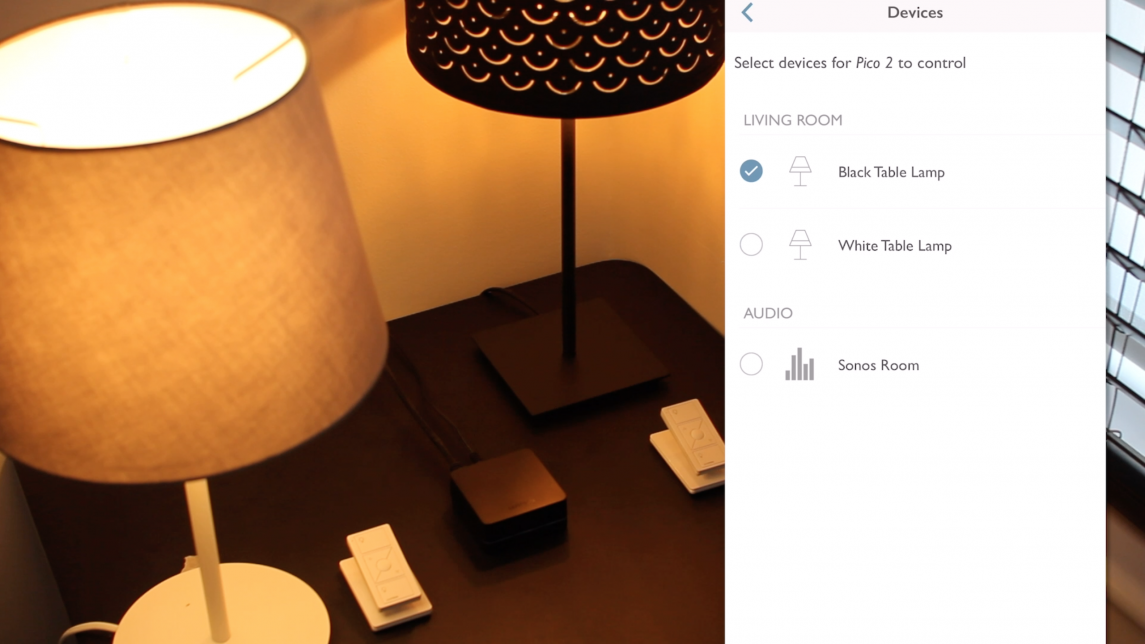
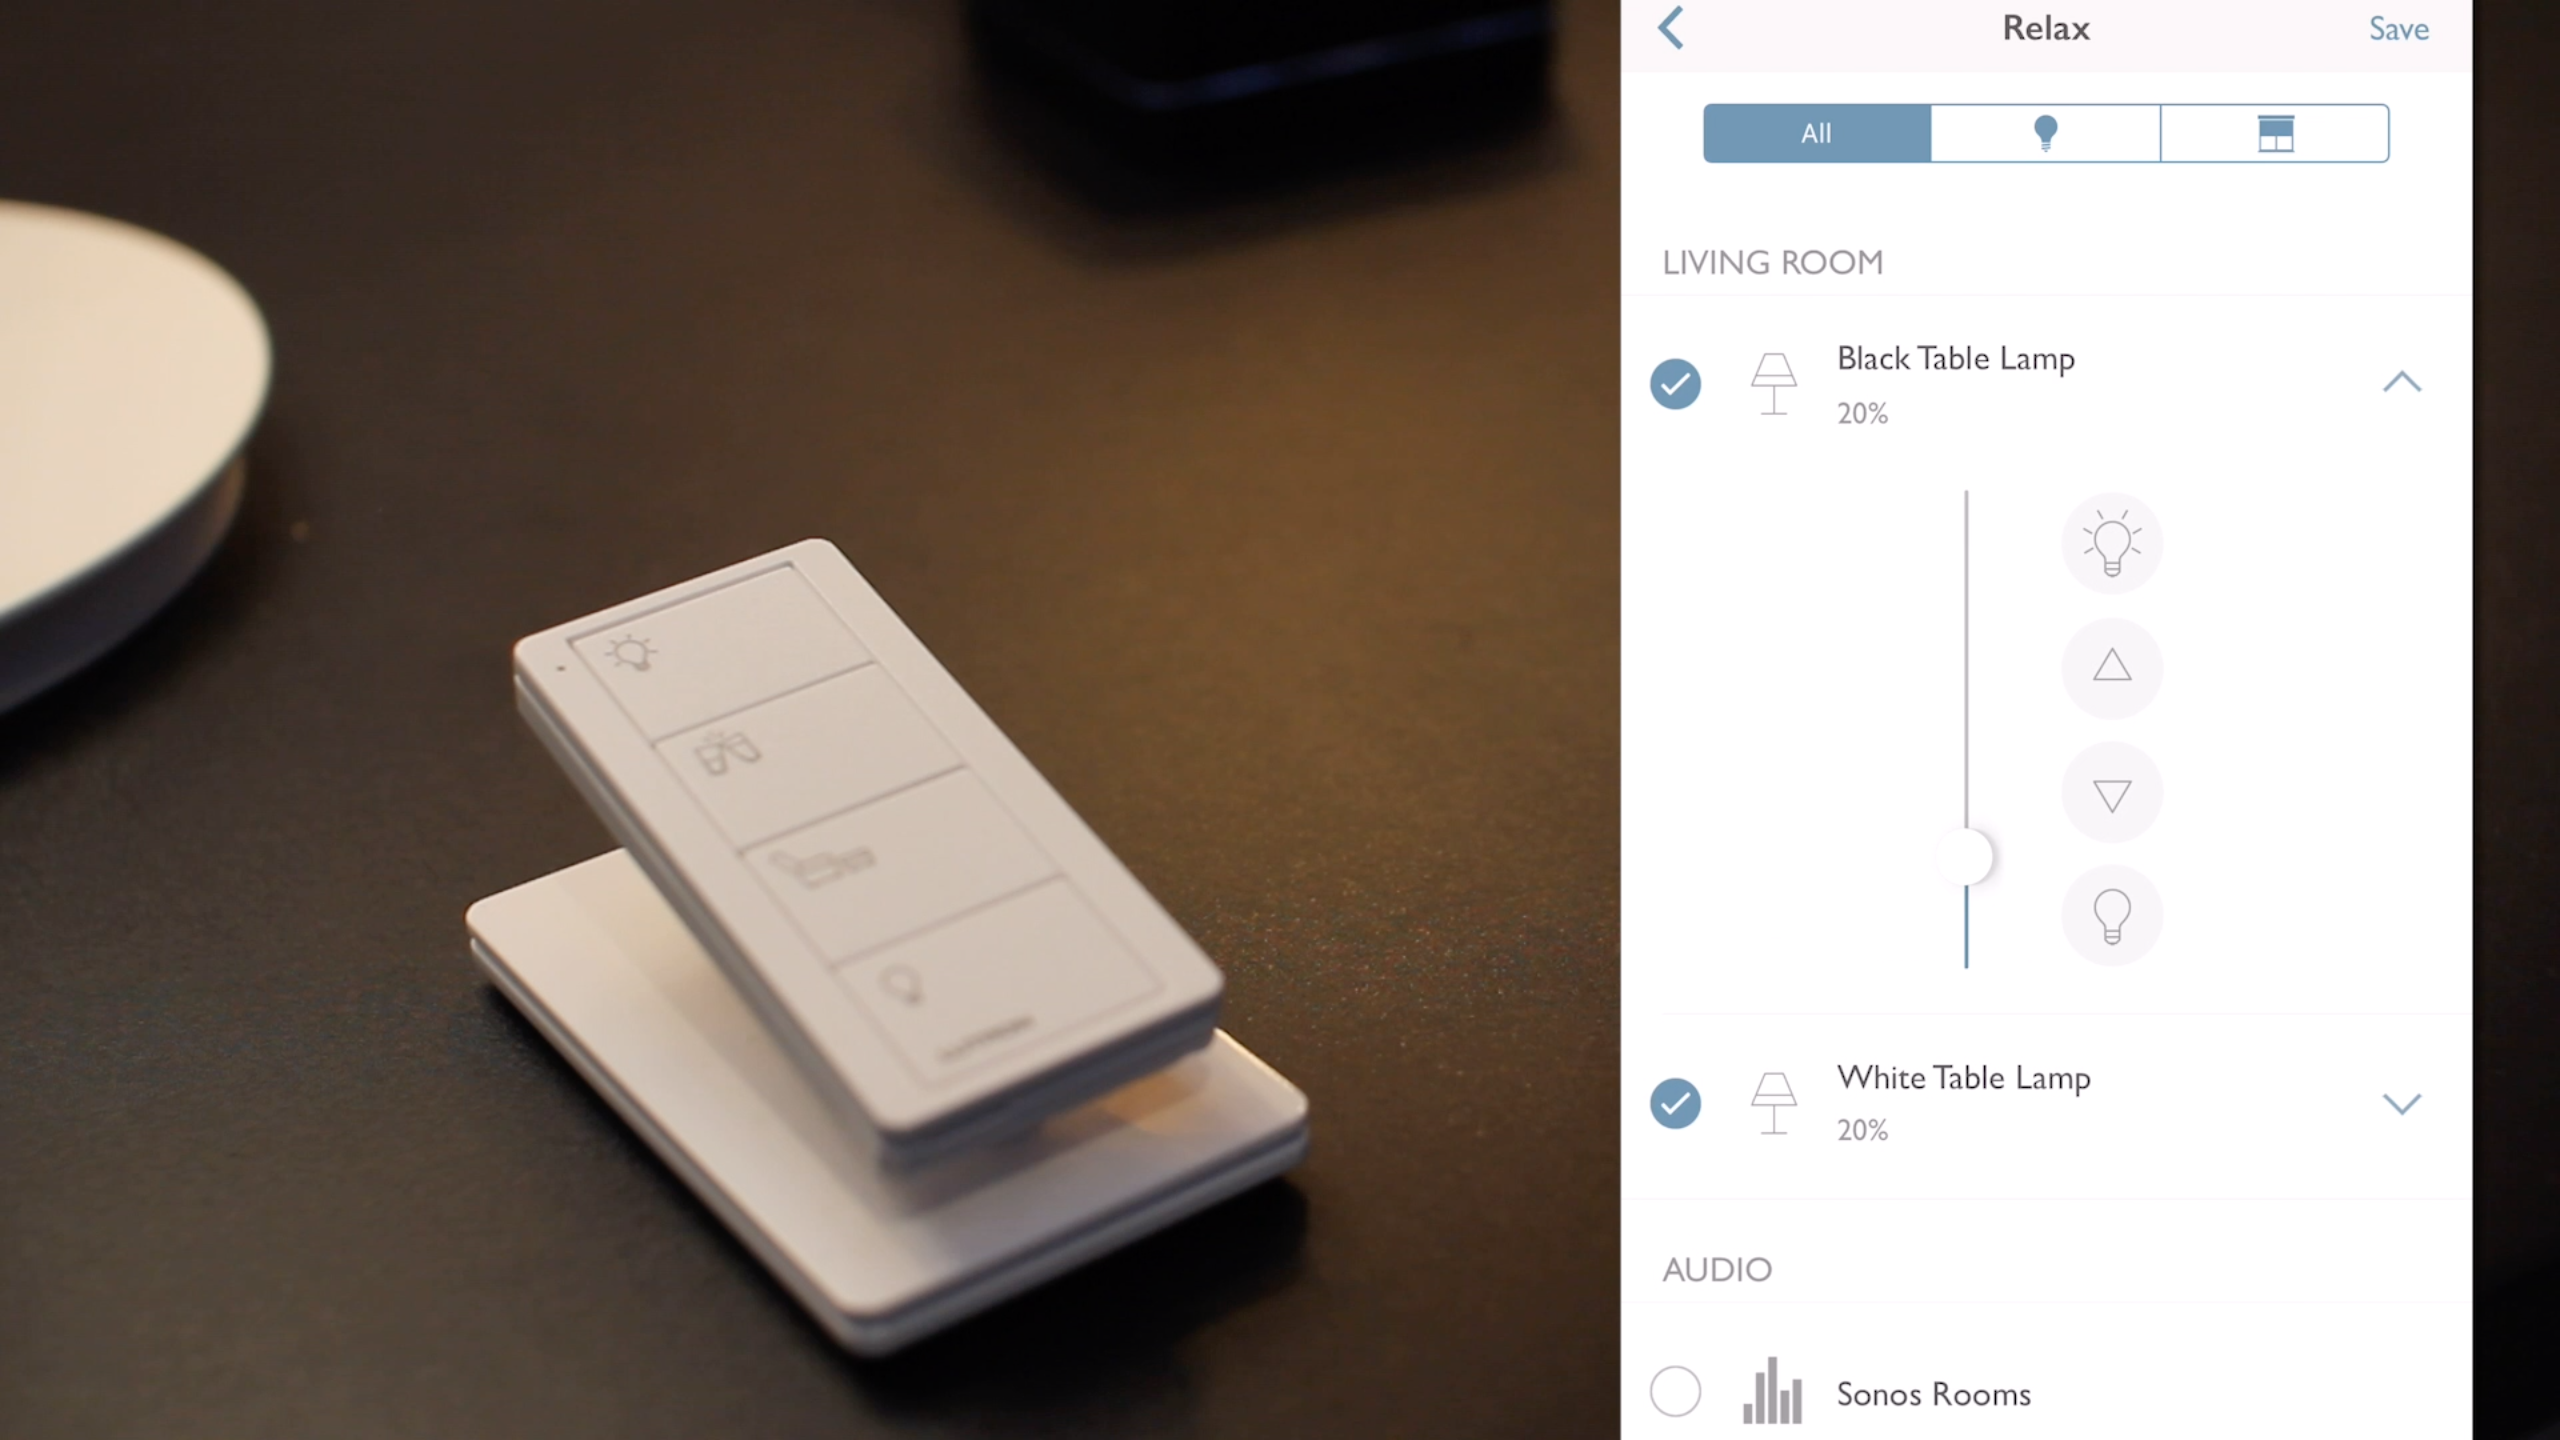
From there, I select “Devices”. From the following screen, I can see which device that Pico is currently controlling. I find my Black and White Table Lamps. 
 
So, as I want that Pico 1 to only control the White Table lamp,
  • I “De-select” the Black one…
  • and click “back”…
From there, I will also change the Name of that Pico 1 to “Pico White Table Lamp” and Click “Save”. 
Back on the main screen, I can see that the name for my Pico has been updated.
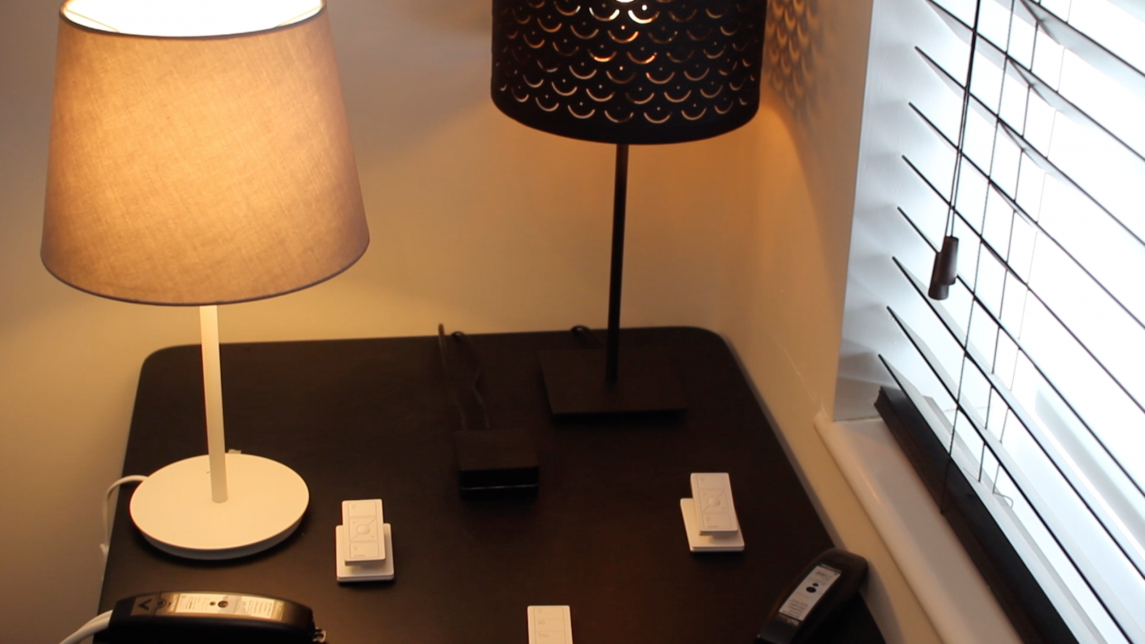
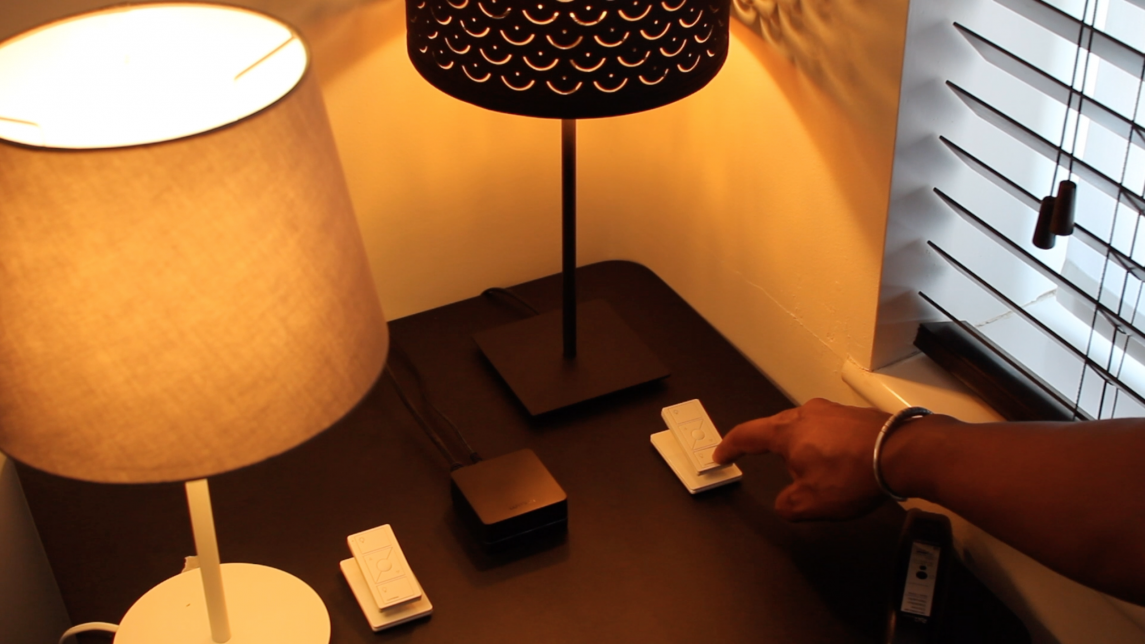
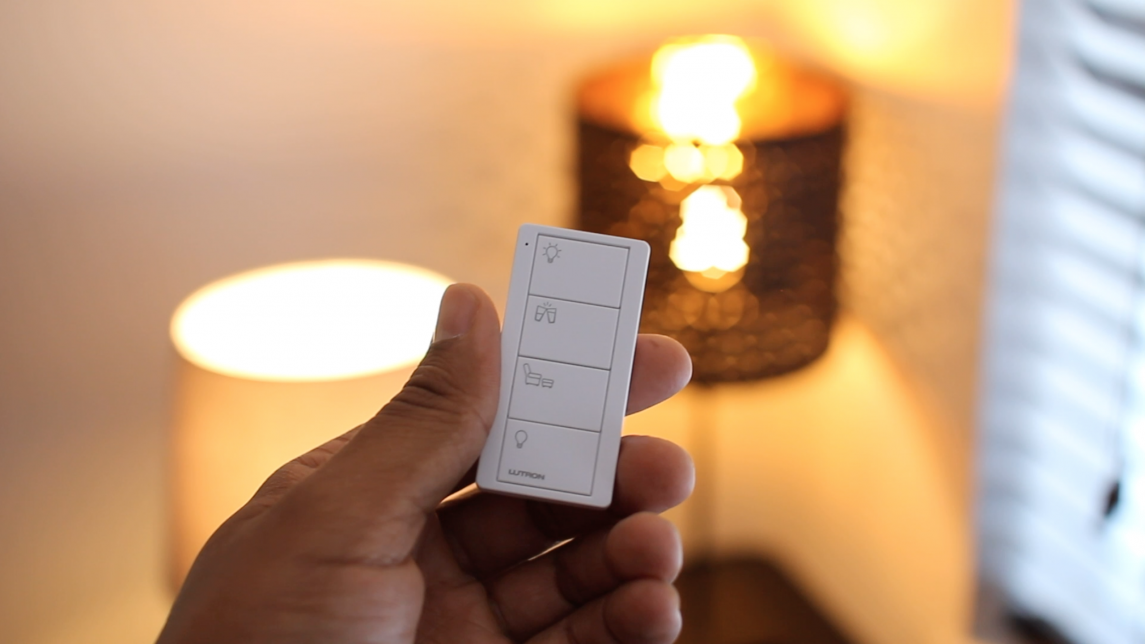
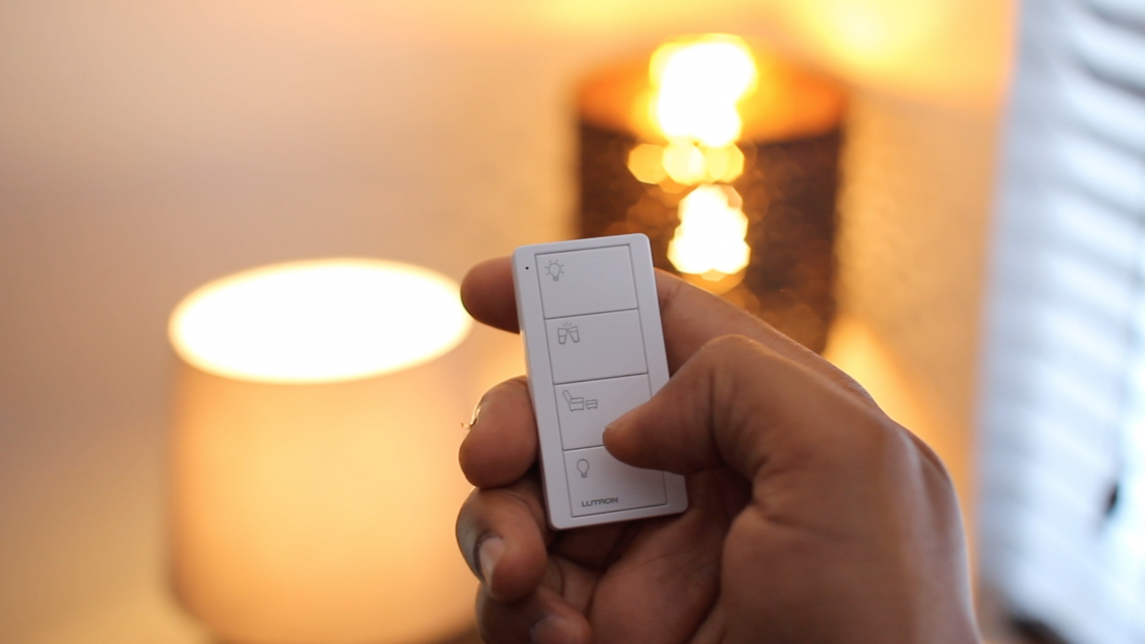
So now, let me test it. As we can see that Pico now controls only that White table lamp.
Adelux Lutron RA2 Select Pico Edit device
Click to Enlarge
Adelux Lutron RA2 Select App edit
Click to Enlarge
Now, I do the same for the Pico 2 to control the “Black Table Lamp” only
  • So I click on Pico 2
  • then “Edit device”
  • In device de-select the “White table lamp” to only keep the Black one….
  • change the name to “Pico Black Table Lamp”
  • click “Save” …..
  • and then test it once the system has finish updating…

Now, I have my Second Pico that only controls the Black table Lamp. Adjusting my Pico programming was Quick and Easy!

Add RA2 Select "Picos" Scene Keypad

What is a Pico Scene Keypad?

Adelux Lutron RA2 Select Pico
Click to enlarge
Now, the last piece of equipment that I want to program as part of my Lutron RA2 Select  Starter Kit is my Pico Scene Keypad.
 
This Pico controller is more to call Scenes that includes multiple lighting circuits at different lighting Levels based on the activity that take place in a room.
 
My Pico Scene Keypad is Pre engraved in a way that it can be use in any type of room really.
 
  • Top button could be a “All ON” type of scene,
  • Next one with the 2 glasses cheering can be use for an “Entertaining type of scene” …
  • The next one with the chair could be for a Relax or Reading scene…
  • And the last one to switch everything Off. Perfect !
  • Those scenes could also includes Lutron Blind Positions and Audio presets if I had the relevant equipment.
  • So that is quite convenient. 

Add a Pico Scene Keypad

  • So lets add My Pico Scene Keypad…
 
  • Same thing here, let’s go to Settings… “Add device”….Then select “Pico remote”….
  • This time I am going to select the Picture that matches my Pico Scene Keypad …in this case I select “4B”….
  • Then press the bottom button for 10 seconds as indicated…
  • Ok, so the App automatically goes onto the next screen… where I’ll choose the room where this Pico is located and I will select “Living room” like the rest of my equipment…Click “Next” ….and I’m done! My Living room – Pico Scene Keypad has been added.
  • So I click the “I’m done button”… and the App is taking me back to the Main screen where I can Find my Pico Keypad.
Adelux Lutron RA2 Select Pico Assignement
Click to Enlarge

Test a Pico Scene Keypad

Adelux Lutron RA2 Select Pico
Click to Enlarge
  • So Let’s test it….
    • I Press on the Top Button…Both of my Table lamps that are part of the Living room go to Full ON….
    • Then when I click on the Second button….My lights are Dimming a little….
    • Then on the 3rd one…here again my lights are dimming a bit further – which will work well for a Relax scene
    • …and on the last one both of my Table Lamps are Turning OFF! 
 
  • So similar to when I first programmed my picos earlier….Here,  the great thing again, is that, all the lights that were on that same room have been automatically assigned to that Pico Scene Keypad 
    • This is quick and easy programming for me…as I can have a fully Functioning Lighting Control System – Straight away – without any heavy programming. This is very good!

Customise a "Pico Scene Keypad"

  • Now lets see How I can customise that Pico Scene Keypad  a little bit… So I select “Edit Device” ….
  • From here, I can Change the Name of that Pico …and Assign it to an other room, If I need to…
 
  • Then, on the Buttons Section, I can access each scene to customise it….
    • So, If I select the “Relax Scene” for example… on the next screen I can select “all the elements” that I can configure on that Scene … or I can Only select the Lighting elements….or Only the Lutron Motorised Blinds & Curtains, but in my setup today I’ve got none. … So let me go back to The “All section” … 
Adelux Lutron RA2 Select Demo Edit Pico
Click to Enlarge
Adelux Lutron RA2 Select Pico Settings
Click to Enlarge

Here,  I can see that Both of my Table Lamps have been preset to 20% in that Relax scene, which is great…but id like to customise it a bit…

    • So, I am going to Lower my “Black Table Lamp” to 5% using its Slider and then, set my “White Table Lamp” to OFF using the Off button….then click “Save”…to go back to Edit Device Screen and “Save” Again…
    • Now, to Test this New Relax Scene, First,  I’ll select My Bright Scene so Both Lamps go to Full Onfirst….then, Select my Relax Scene and see that Both of my Table Lamps are going to their New Lighting Levels – which is great! 

There you go!

Voila, there you have it
We just completed the basic set up of my Lutron, RA2 Select System Starter Kit
  • We wired the inline dimmers to 2 separate Lighting Circuits. 
  • We’ve Downloaded the Lutron RA2 Select App and followed the instructions for the initial set up. 
  • We wired the RA2 Select – Main repeater. 
  • And we quickly programmed our dimmers and picos within the App
  • And Hopefully that has shown how easy it was to complete a Basic set up. 
 
On the next tutorial, we will review some other advanced settings available within the Lutron RA2 Select System    
So please, make sure to Like and Subscribe so you can be updated when the next video is released. 
 
Thank you very much 
And talk to you again on the next tutorial 

Xavier

The Video: Lutron RA2 Select Basic Step-by-Step Programming Guide

Leave a Reply

Your email address will not be published.