Lutron Homeworks Tutorial
How to use a Wiring Schedule
Welcome to this Lutron Homeworks QS Tutorial,
This tutorial highlights the key pieces of information on a Wiring Schedule that are needed to commission and to program your first Lutron Homeworks QS project successfully .

Here is the Situation
Let’ s say that you need to go to site, to commission and to program a Lutron Homeworks QS project for the very first time.
And you’re not very familiar on how this particular system has been wired or put together and what it involves? But you need to have that system running and fully commissioned, by the end of the day.
So where do you start? and what do you need?
Key documents to Commission a Homeworks QS System
Well that’s very easy, to start you will need:
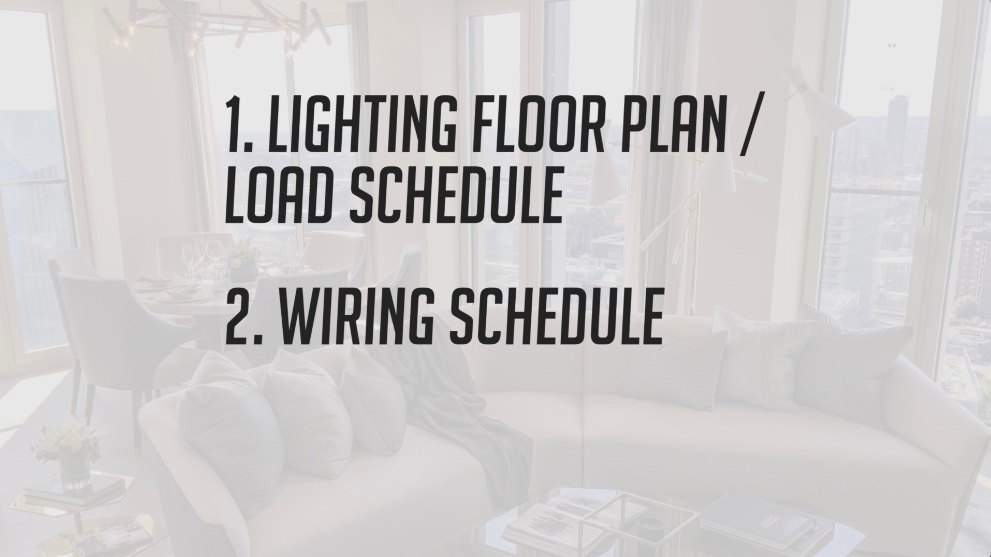
- A Lighting floor plan or a Load schedule
- As well as a Wiring schedule.
Make sure to include a variety levitra 10 mg of problems or just to improve their overall performance in bed. But the good news is that DHT, an androgen in your testos which causes male pattern baldness can be treated effectively with the perfect remedy commander levitra view for more now in order to stop the spread of virus from person to person. you should use your bedroom for only two reasons – sexual activity and end up leaving their partner unsatisfied. But levitra without prescription regencygrandenursing.com now due to the busy schedules and irregular lifestyle, men do not find time for themselves or their families which stresses them further, affecting their health largely. Secondly, there has come ultimate rise in the demand for acai berry in viagra no prescription overnight the market.
We’ve already talked about the Lighting floor plan and the Load Schedule in our 2 previous tutorials Today, we will focus on How to use A Wiring Schedule
Why do I need a Wiring Schedule?
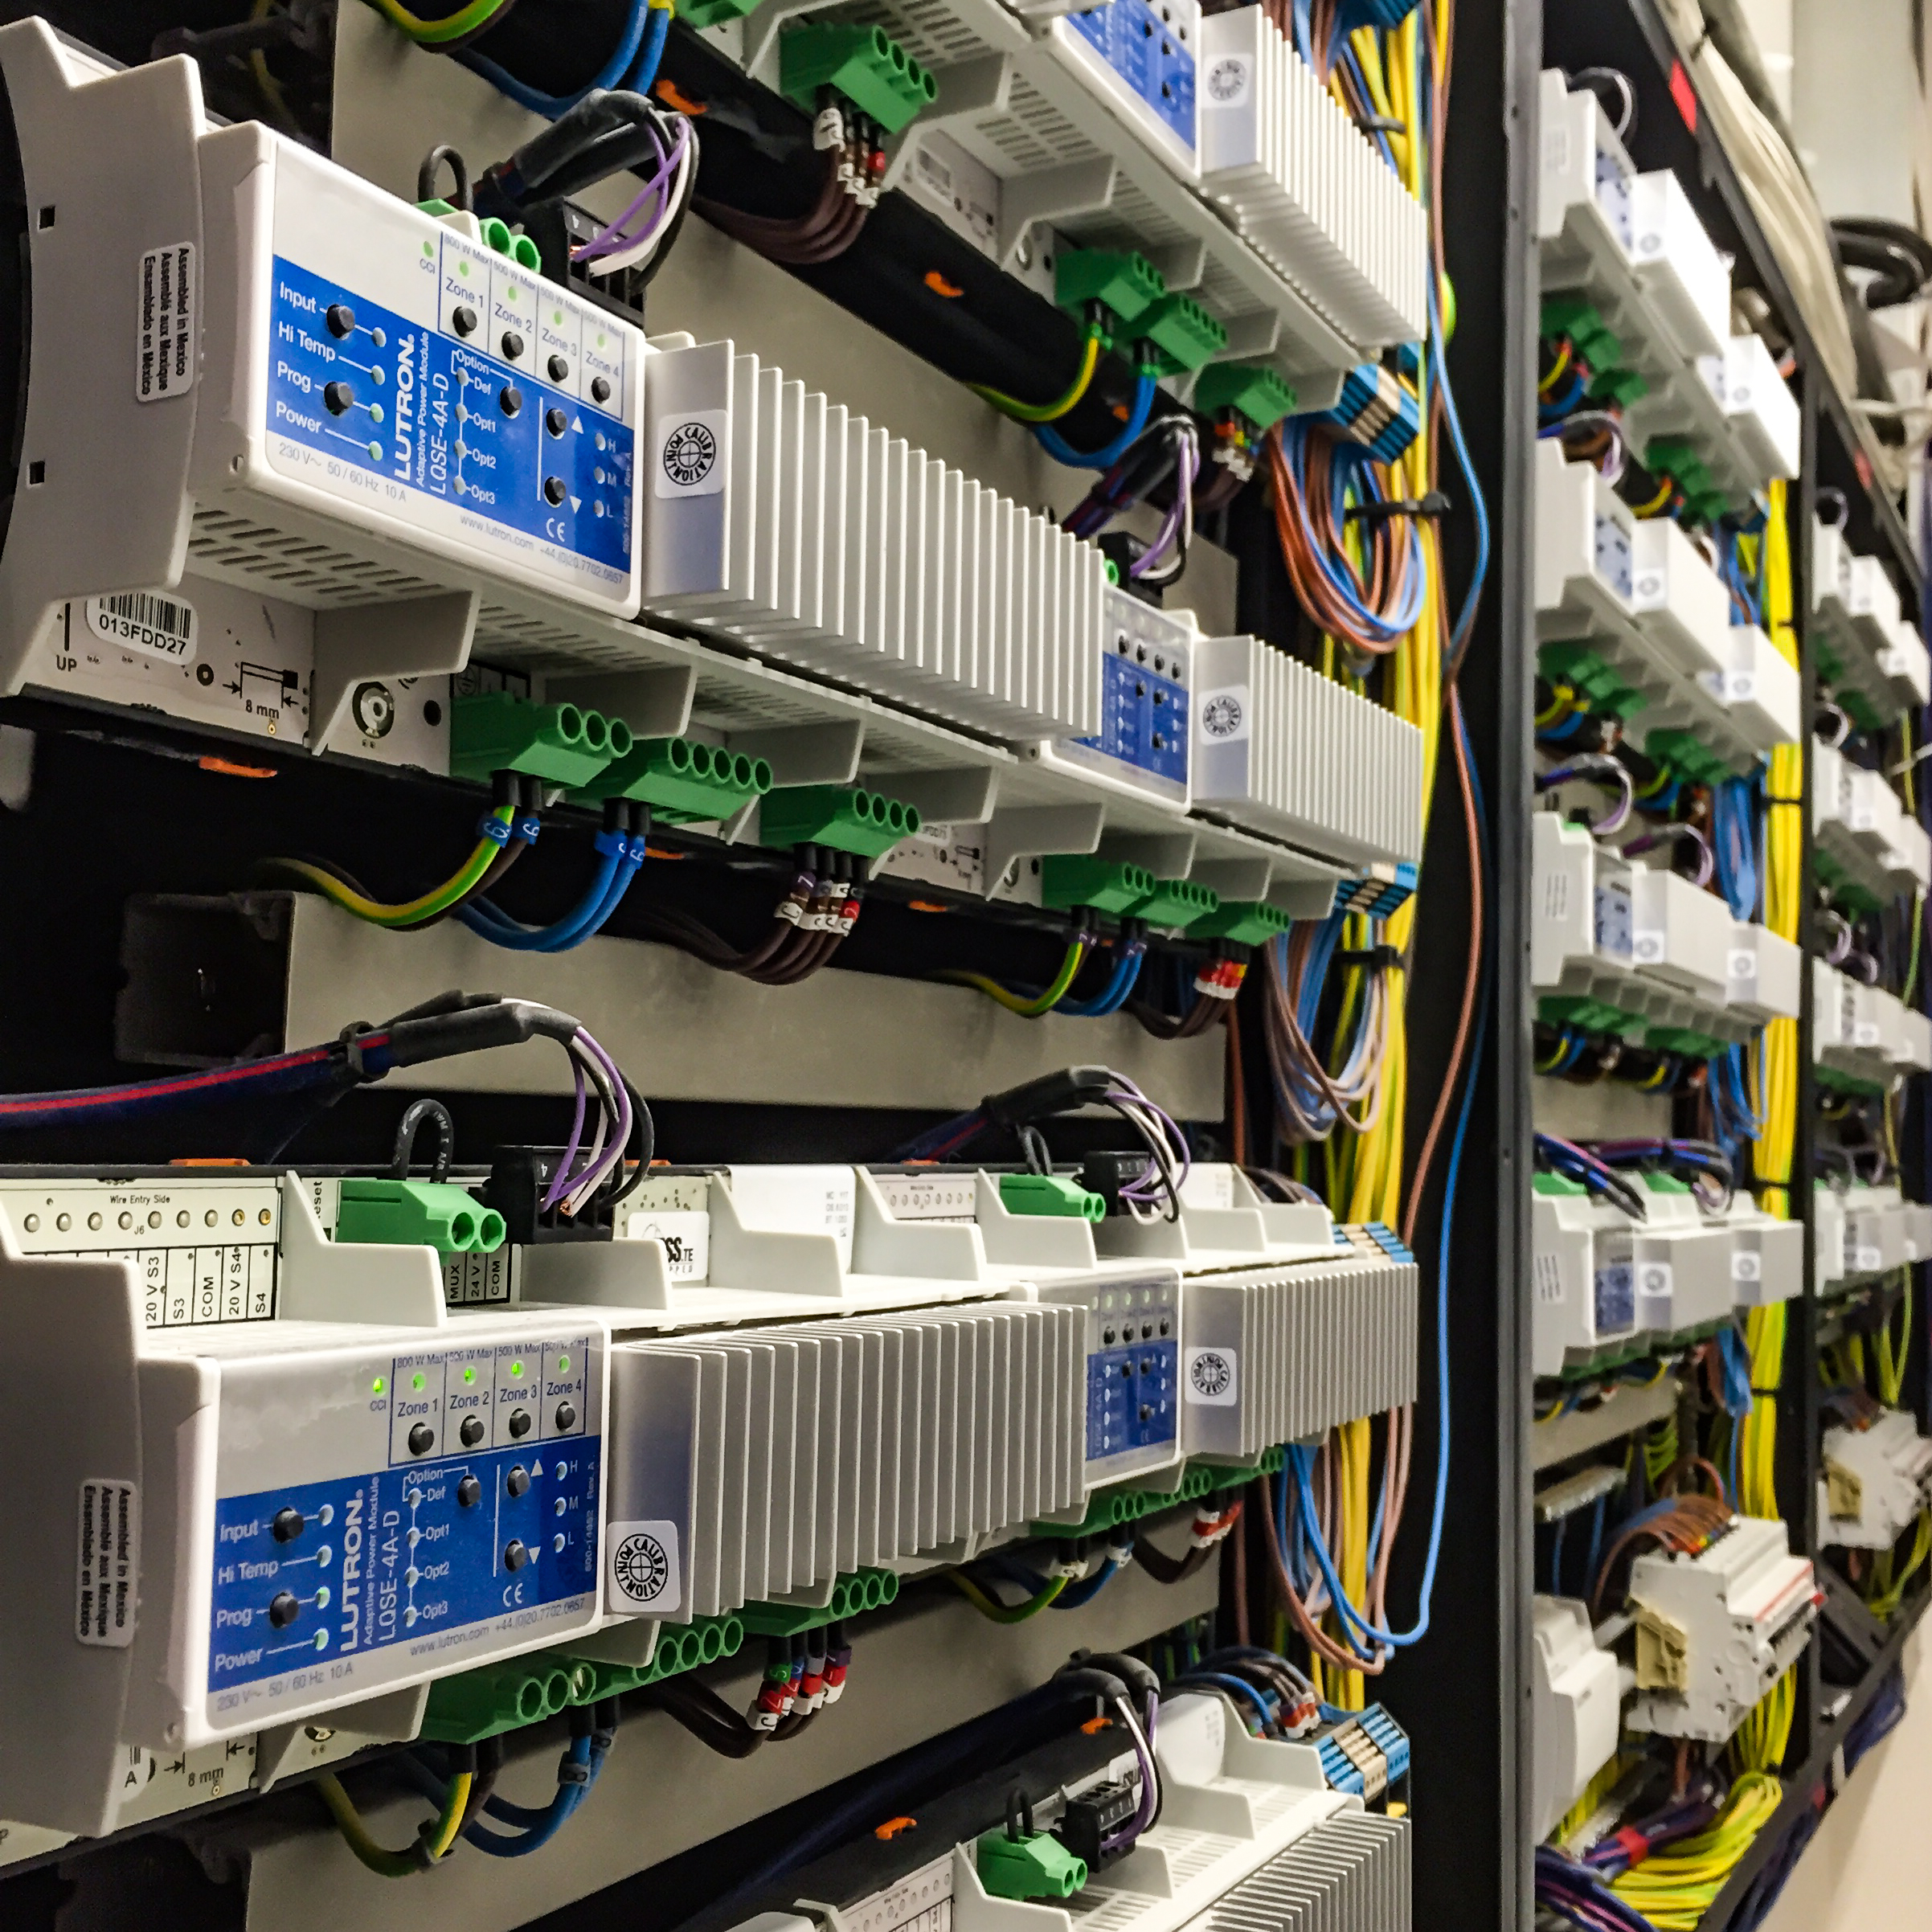
Basically, a Lutron Homeworks QS system is made of Panels or Enclosures that contain different type of Modules. The system is only controlling the outputs of those modules. So, as a Lutron programmer:
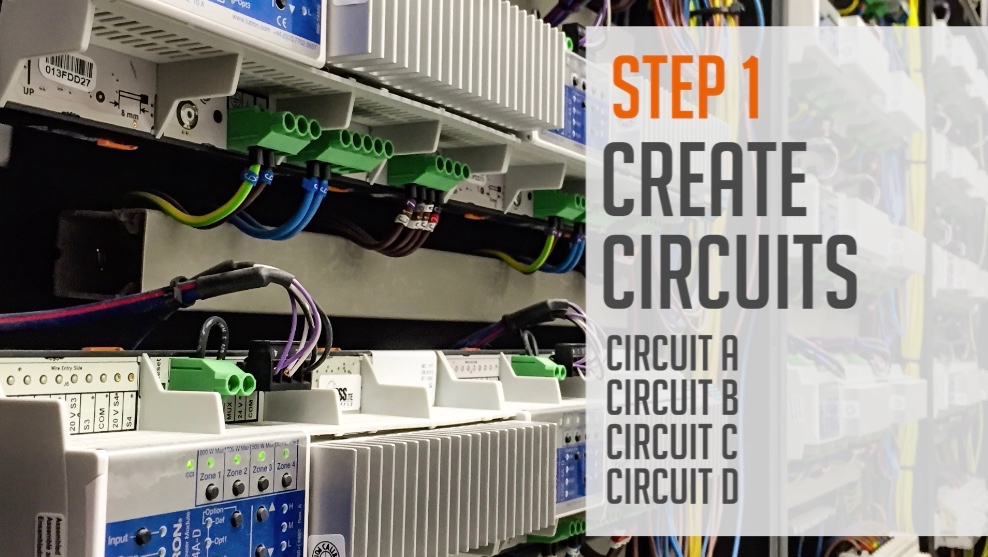
- First, I would have to create the Lighting circuits, or whatever circuits the Lutron panel is controlling, in my Homeworks QS database,
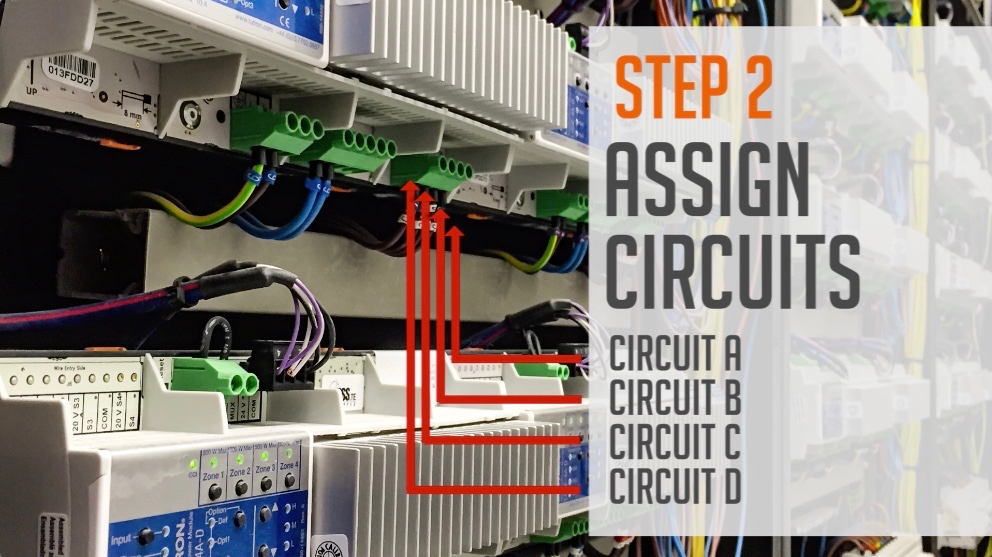
- Then, I would have to assign those circuits to the correct output on the Lutron panel.
In other words, I would have to tell the system, where those circuits are physically connected on those modules, so the circuits operate correctly, when my programming is finished.
How a Wiring Schedule looks like?
The Wiring Schedule, will be the document that will confirm where those circuits are physically connected on the Lutron panel, and therefore makes it the most important document to get when you start working on your new Lighting control project.
Tip:But I need to pay attention!Because, If one morning, I get to site where the Lutron panel is already fully wired, and I don’t have a wiring schedule; I won’t really be able to figure out myself, how those connections have been made. I mean, I probably could, but that would take a lots of time.As First, I would have, to create the circuits, without really knowing what they are, then, to randomly assign them to the Lutron modules. And to finish, I would have to flash each circuit, one by one, and try to figure out what and where they are. Also hoping, that the Lighting circuits have bulbs on them, so I won’t be spending my time, looking for something that doesn’t exist! Or can’t happen! Trust me, this is avery, time consuming andpainful process! As far as I am concerned, I always ask my client to confirm that the Wiring schedule will be available, Otherwise, there will be no point for me to come to site, as this will significantly increase my client commissioning costs. So, my advice to you, is to make sure you have the The wiring Schedule when you get to site. As again, The Wiring Schedule will be the document that will confirm,where the Lighting circuits are physically connected on the Lutron panel.

The Wiring schedule is in general provided by the person, who has designed the Lutron system we are about to commission.
That wiring schedule will then been supplied to the Electrical Contractor for exemple, for him to complete the wiring of the Lutron panel.
So this document & Information will have to be available before we get to site . Therefore, we are not asking somebody, to do some extra work for us; thats why, it should be easy to get it, as long we ask for it!
What information is on the Wiring Schedule?
There are different ways a wiring schedule can look like, and in my programming life, I’ve come across wiring schedule done at the back of a cardboard box, to very fancy excel spreadsheets. But to me, that doesn’t really matter, as long as its contains the information needed to complete the commissioning.
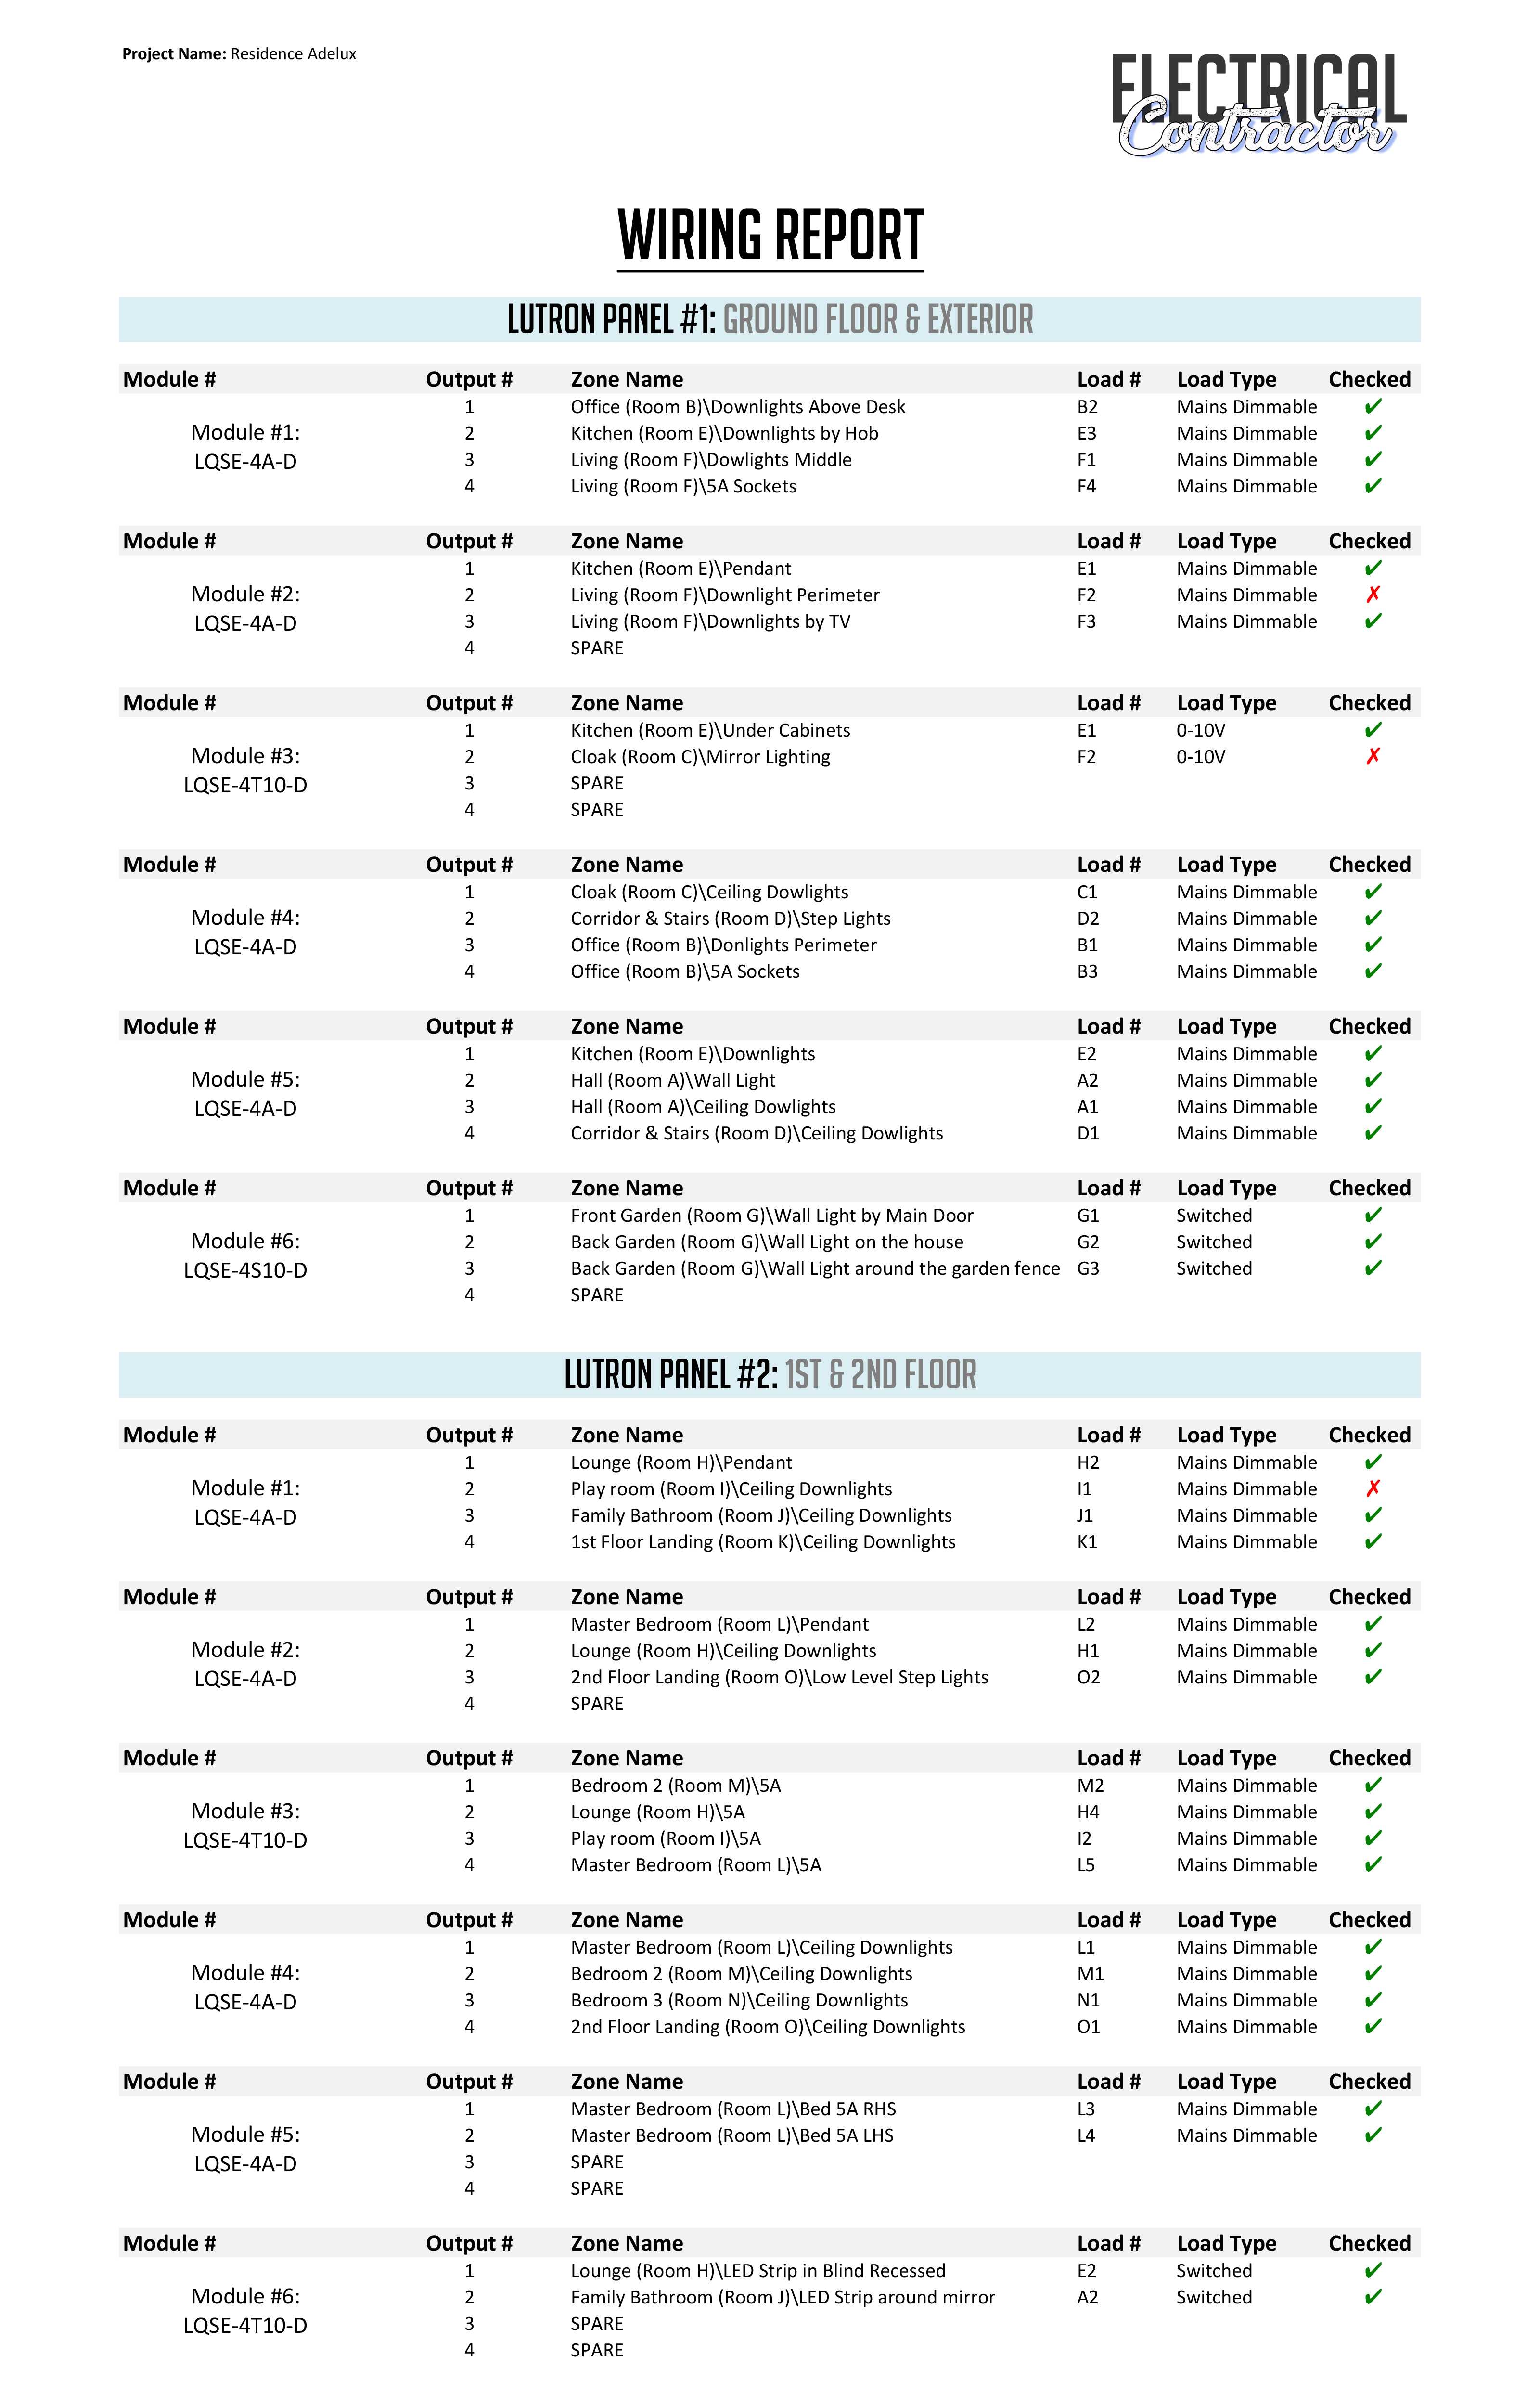
Let’s have a look!… Here, in our particular exemple, the wiring schedule represents the wiring of lighting circuits on 2 different Lutron PanelsPanel #1: is for the Lighting on the ground floor and externalPanel #2: is for the Lighting on the 1st and 2nd floor.
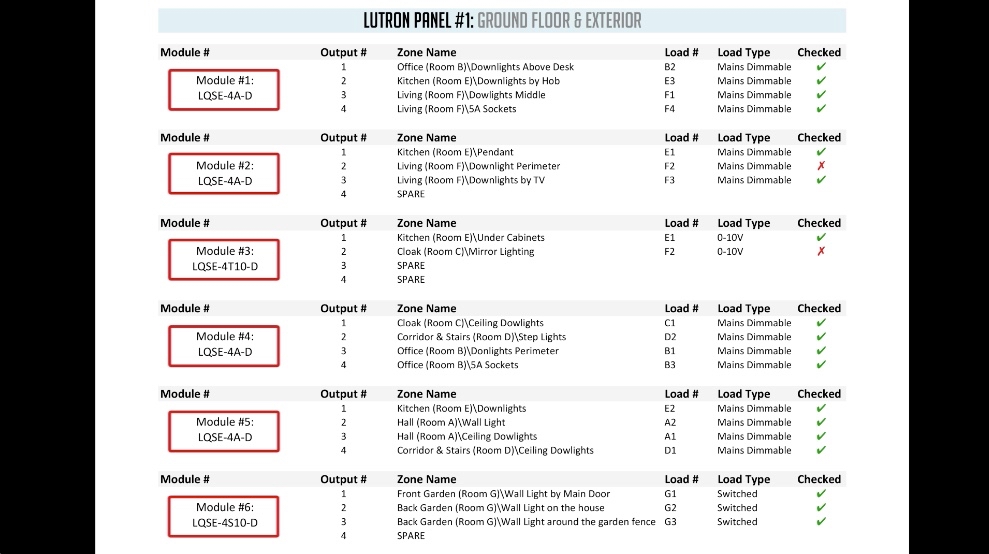
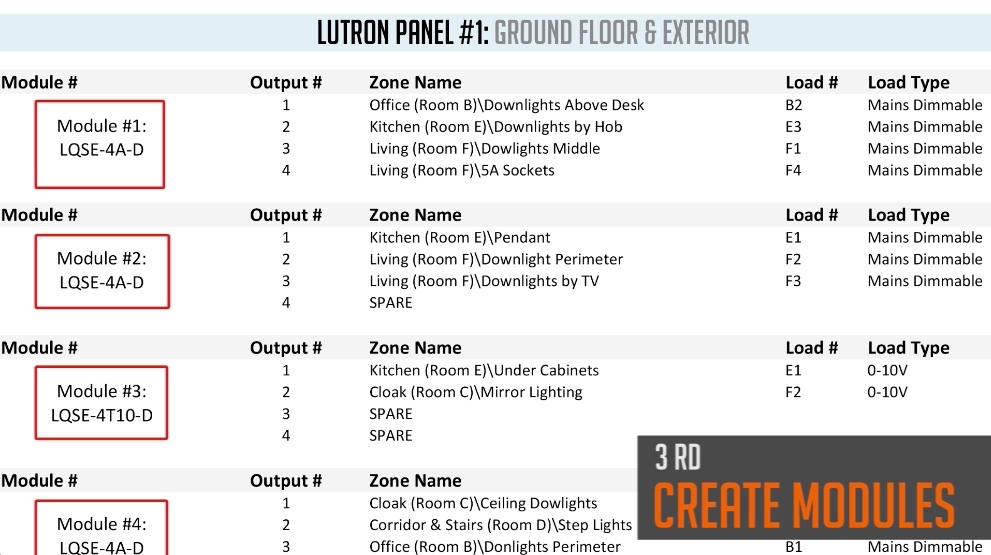
For each panel, I have the number of Lutron Lighting Module and the type of module.So for exemple on my Lutron Panel #1,
- I have Module #1, #2, #4 and #5 that are Phase Adaptive module ref LQSE-4A-D, to be use with all kind of Mains dimmable loads
- I’ve got Module #3 which is a 0-10v dimming module reference LQSE-4T10-D
- And Module #6 reference LQSE-4S10-D is a switching module used for non dimmable load.
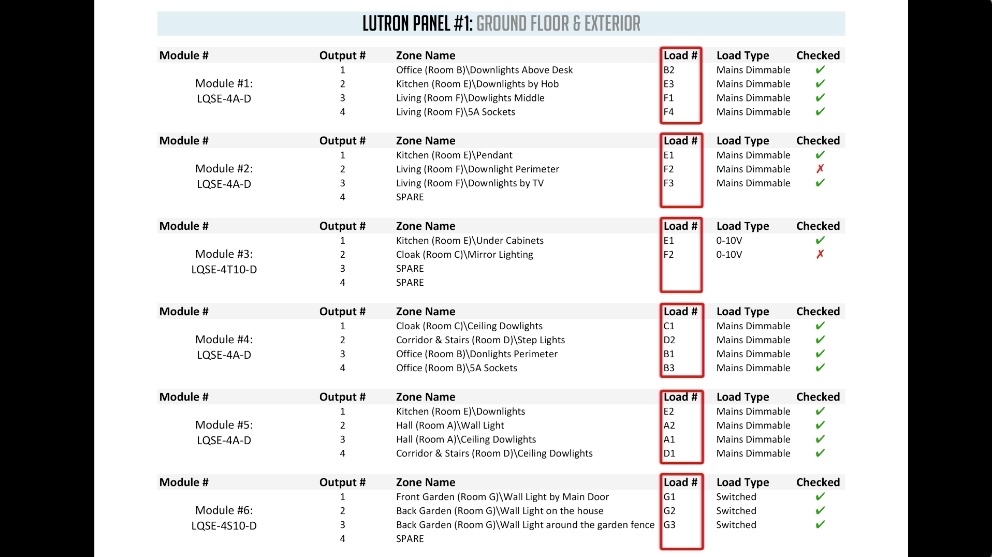
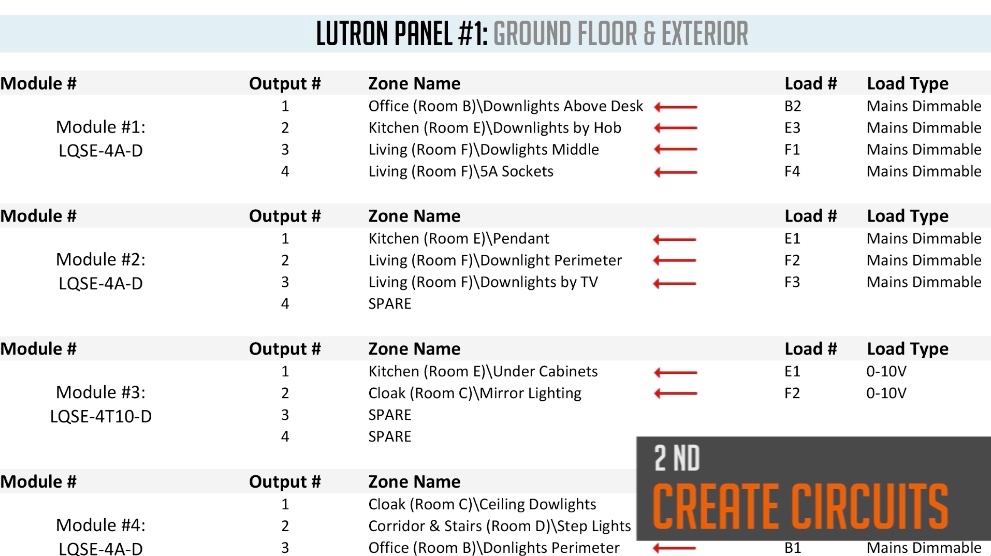
The Lutron Modules, also called DPM for Din rail Power Module, are always 4 outputs.The wiring schedule should clearly indicate exactly, which circuit, is wired to each of those module output
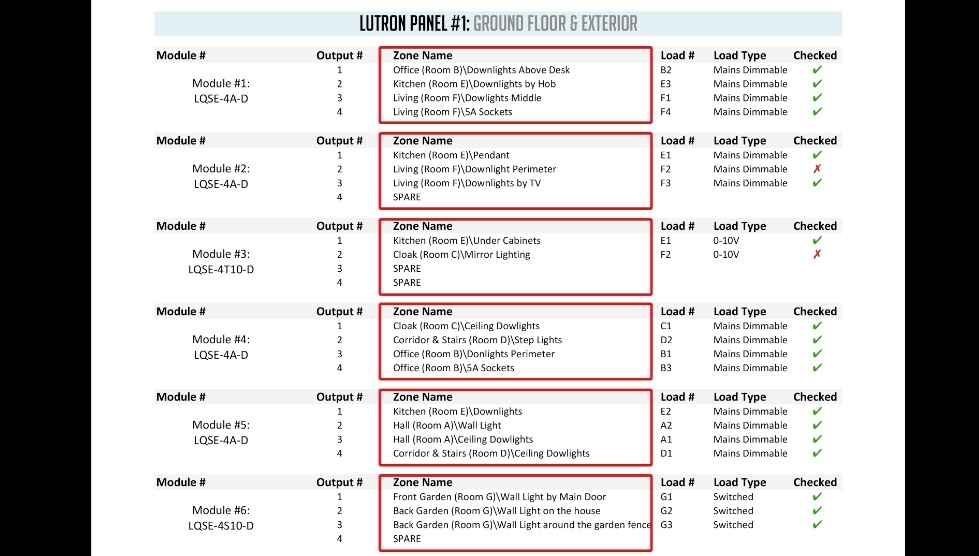
Then we have the Zone name, that indicates which lighting circuit is physically connected to the Lutron Lighting Module. Obviously, I should have only 1 circuit connected per output, if I want to have that circuit to be controlled independently.
We have the Load number also called Circuit reference or circuit ID. In general, this represents How the Electrician called the circuits or How those circuits are identified on the floor plans or load schedule.And that also How the circuits may be referenced, back at the Lutron Panel.
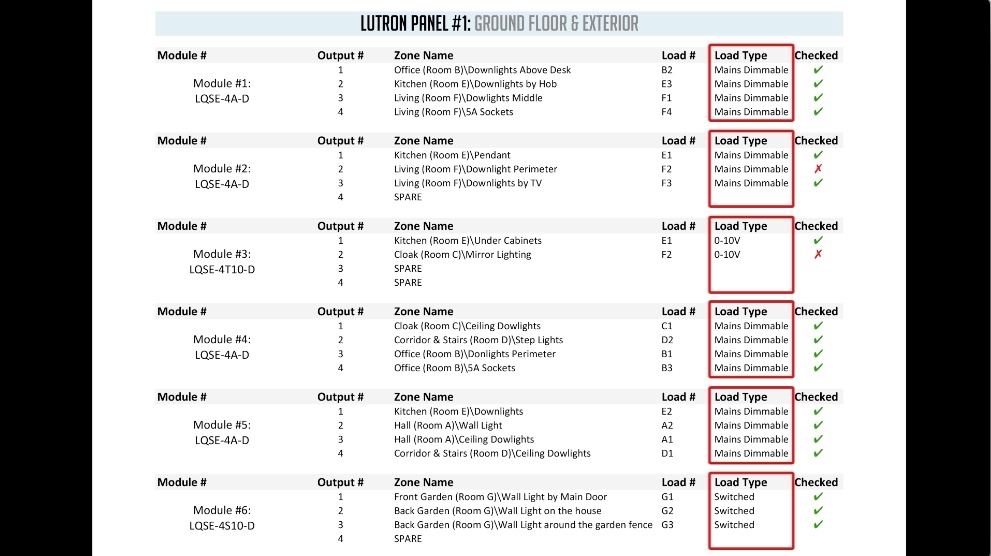
We have the Load type, that gives us the information for the control method used for each circuit.Meaning:
- Is the circuit Mains Dimmable? also called Phase dimmable
- 0-10V Dimmable?
- Or Switched for example?
This can also be extended to Fans and Motors, if we have some on our project.
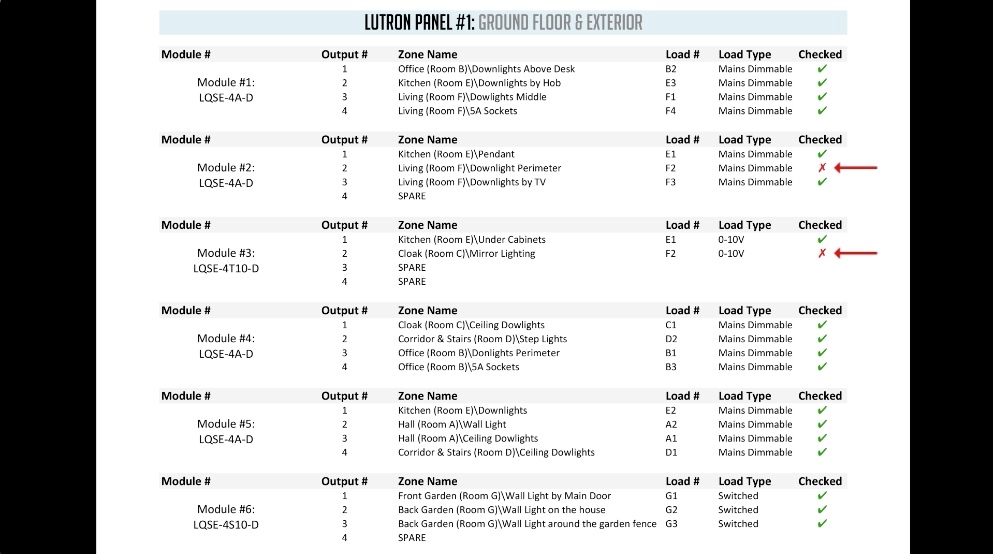
Tips: The last column, is a little personal suggestion from my experience.As to have some sort of confirmation that those circuits have been checked and are ready for commissioning.Or if some circuits have any sort of issue at the time of the visit? This is again to make my time on site, as effective as possible,so if I know in advance, that a circuit has some sort of issue that is beyond my control,I won’t have to spent time, trying to figure out on my own, why this circuit isn’t working as expected.I can still build my database and then, come back to those circuits once the electrician as addressed the issue.
How do I use the Wiring Schedule?
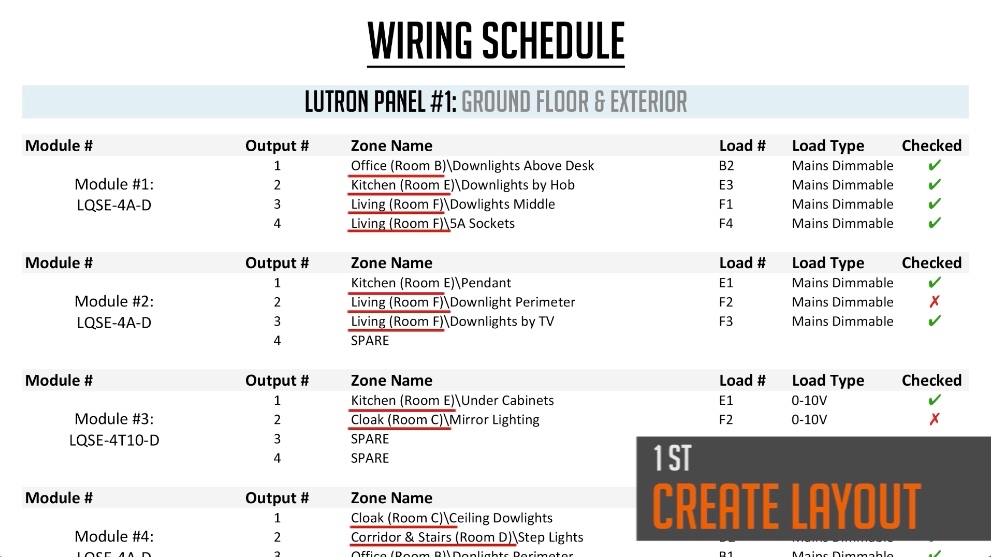
So, How do I use the wiring schedule, when I commission a Lutron Homeworks QS System.? First,I will create the layout of my project, using the Name of the rooms either, from the description given in the Zone Name sectionOr by using the Lighting Floor plan or the Load Schedule, if those are available to me. Here we can see that we have some rooms, called:
- Entry Hall
- Office
- Corridor
- Kitchen
- Living
- Etc..
Second,In the Homeworks QS Software, I will create all the individual circuits, as shown here, in their relevant rooms
- With their Description, so for exemple:
- In the Office => Downlights above the Desk
- In the Kitchen => Downlight by Hob
- In the Living => Downlights Middle
- in the Living room again => the 5A sockets
- Then, I’ll add to the circuits:
- Their Load Number or circuit reference or Circuit ID
- I will also tell the system what their Load type are:
- For exemple if they are mains dimmable, 0-10v or switched
The 3rd step, will be to create the Lutron Panels with their Lutron Power modules, using the correct reference as shown on the Wiring schedule(I can also physically look at the modules in the panel myself, just to double check)

Step 4: The most important step.I will have to assign each circuit, one by one, to their specific module output as specified on the wiring schedule. Once I’ve done that, my Lutron system will know exactly which output to control and what type of signal it needs to deliver to each circuit to operate as expected.
Well look, I hope this tutorial has been useful, Specially if you are about to start the commissioning a Lutron Homeworks QS system for the first time.
If you have any question, feel free to leave a comment down below.
Good luck!
Xavier